Menu


As you guys know and as I have written many times before: we are always open and listening to requests, wishes, and opinions from any of our customers. This informs our entire process when planning what we are tackling in our development sprints and when deciding what to do next.
The same goes for this sprint. While we are preparing some big changes in the background, that will help us increase performance and enable us to deliver often requested features, we also saw that those big changes will take some time. We then saw a couple of less work-intensive, often requested, features that we could do while working on the big stuff and that is what you are getting today. Here are the new features available with the release of just plan it on October 18, 2021.
Before today the approval of your operators' shopfloor feedback had to be done manually by one of your planners. This was done to give your planner full control on when to approve and to give them the opportunity to collect any missing data from the shopfloor.
But if you have worked with just plan it for a while and your operators are trained to log the progress of their operations, the need for a final control instance becomes less important and can even turn into a cumbersome additional step in your daily routine. This is why we decided to give you the option, to have the approval be done automatically. We set this up in two different ways to make sure you can configure the “Auto Approval” to fit your process the best.
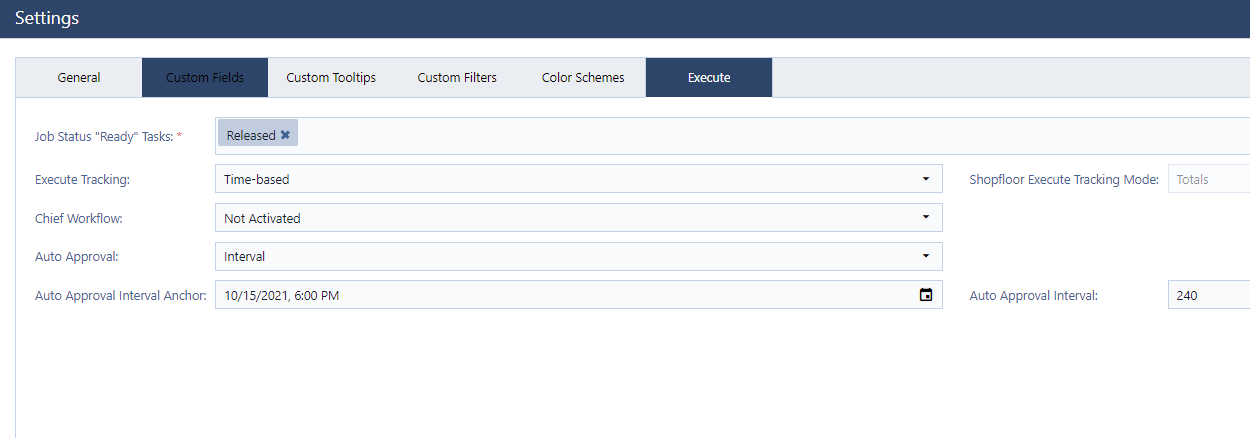
To change your approval configuration you need to open the Settings dialog and select the Execute Tab:
 The first thing to notice is the menu option “Auto Approval”, which has the following options:
Off: This is the default and includes the planner approval process you are currently used to.
Interval: This allows you to set an anchor point and specify an interval in minutes. Every time a multitude of the interval has passed since the anchor point the auto-approval will trigger. E.g. if you set the anchor to be October 15th at 6:00 PM and specify the interval as 4 hours or 240 minutes, starting from 18:00 the auto-approval will run every day at 2:00 am, 6:00 am, 10:00 am, 14:00, 18:00, and 22:00. Here the interval can be defined in 15-minute steps.
Timed: If you select the Timed option you can set specific times for each weekday, similar to setting the work times for resources. This then means, that at the given times each day the approval will be triggered. This option lends itself best if you have multiple strict shifts each day and want to update the plan at shift end.
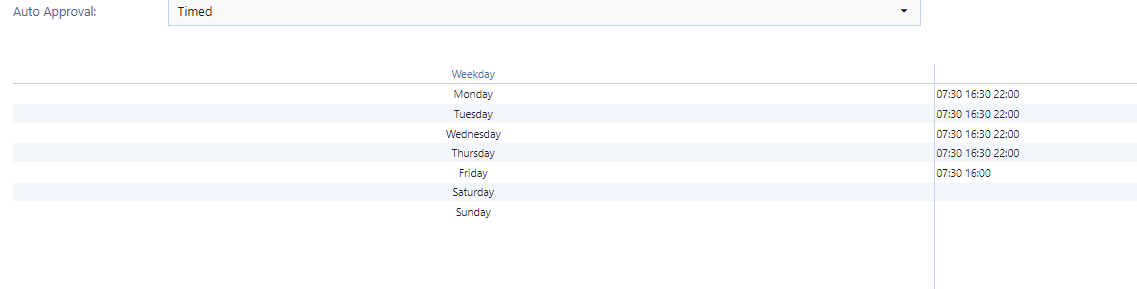 As with the interval, you can define the times to the 15-minute mark, meaning that you could say 6:15 am but not 6:25.
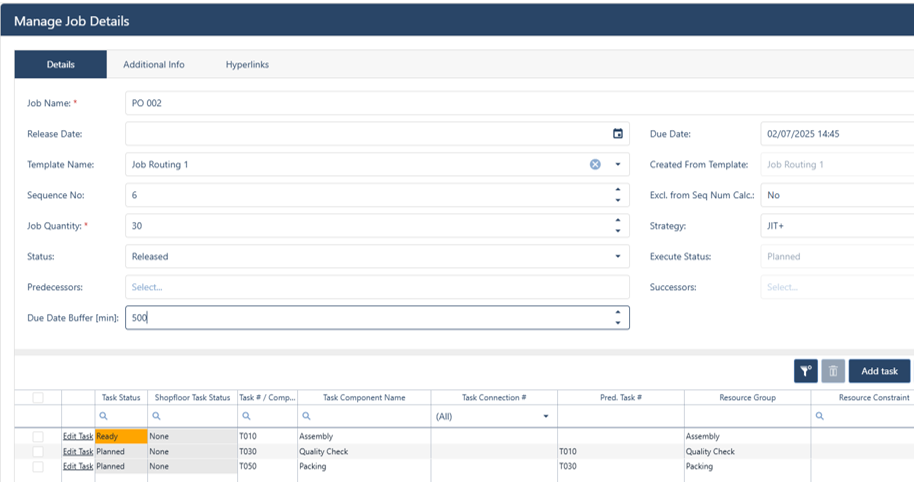
Once you changed the procedure to Auto Approval, all data that your operators set into the shopfloor data storage will be approved automatically at your defined date and will trigger a rescheduling accordingly. If you have activated the chief planner workflow, all data that was forwarded by the chief planner will be approved automatically at your defined date and will trigger a rescheduling accordingly.
Again: this is a great help for those customers who have been working with jpi for a long time and have a very established shopfloor progress setting process.
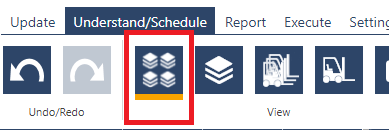
The resources in the Resource View have always been ordered in a non-obvious way. It collected the order from the Resource Group View, skipping repeats. That can lead to a view, that feels confusingly sorted and to a lot of scrolling around, looking for your resources.
With this release, we enable you to sort your Resource View to your liking in the same way you can sort your resource groups in the Resource Group View. Hence, this has no impact on scheduling and allows you, to have your priority resources, that require most of your attention, at the top and resources that need less supervision lower in the list. Or you can separate the employee from the machine resources.
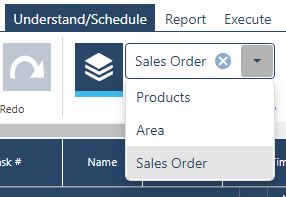
You can change the order of resources, by going to the Resource View and clicking on the number in the table:
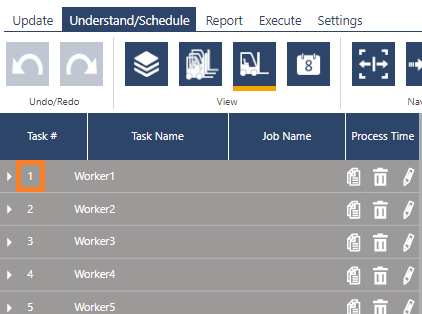
This will open a small dialog allowing you to change the position of the resource to where you need it.
We also did a shadow release in mid-September with some minor enhancements, that you might have noticed already:
We updated the Settings dialog to follow the same approach as our main update dialog, collecting all settings into one tabbed dialog:
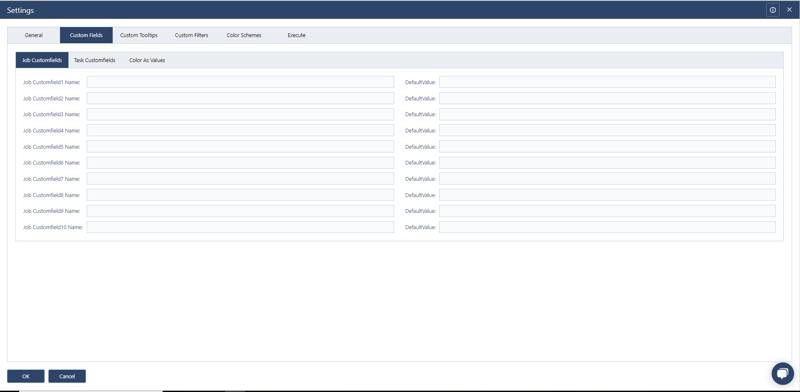 As you can see in the image above, we also increased the number of available custom fields on jobs and tasks from 2 to 10.
Finally, we implemented some changes to the operator client to improve performance.
That’s it for today. We are happy to have released these requested features and are really excited about what's coming next.
As I said in the opening paragraph we are happy and eager to receive any feedback from you guys and to answer any questions you may have.
Until then,
Happy Scheduling!
just plan it is a production scheduling software plus scheduling tools & best practices to help high-mix low-volume make-to-order manufacturers gain transparency and control over their shop operations. The software plus its methodology is used by thousands of people around the globe. They consistently achieve improved on-time deliveries, shorter lead times, and better utilization of their resources.
As just plan it is not just software, but a lot of processes and best practices, we recommend that you start with an exploratory meeting. If we agree that there is a fit between your requirements and our approach, we'll build a prototype for you.
Hence, it all starts with a meeting. Book that meeting now.

No Comments Yet
Let us know what you think