Create, Edit And Apply Color Schemes
Colors play a significant role in visual scheduling as they not only help the users to faster understand the complete and often complex reality of the plan but also help to make crucial decisions faster.
just plan it comes with a default color scheme that cannot be changed: Grey for quoted jobs, light blue for ordered jobs, dark blue for released jobs and red for all delayed tasks.
However, some situations require extending the default color scheme or creating individual schemes. This might be the case if, e.g., you'd like to put special emphasis on certain customers to always have jobs and tasks related to them in sight.
The criteria for binding the appearance of certain tasks to certain colors can be chosen from a list of given task details/parameters being part of just plan it - either fields of your data base, like customer or resource, or calculated fields like "HasWaitingTime" and "HasWaitingTimeAndJobIsOverDue". By using the latter two, you can even define color schemes with which to highlight potential or actual bottlenecks.
Moreover, the "Color as Values" option lets you highlight task details that go beyond the list offered in the "Manage Color Schemes" dialog but are important for you and your individual planning situation, if you, e.g., want to see immediately when certain material types are being used in a task.
Usage of color schemes: an example
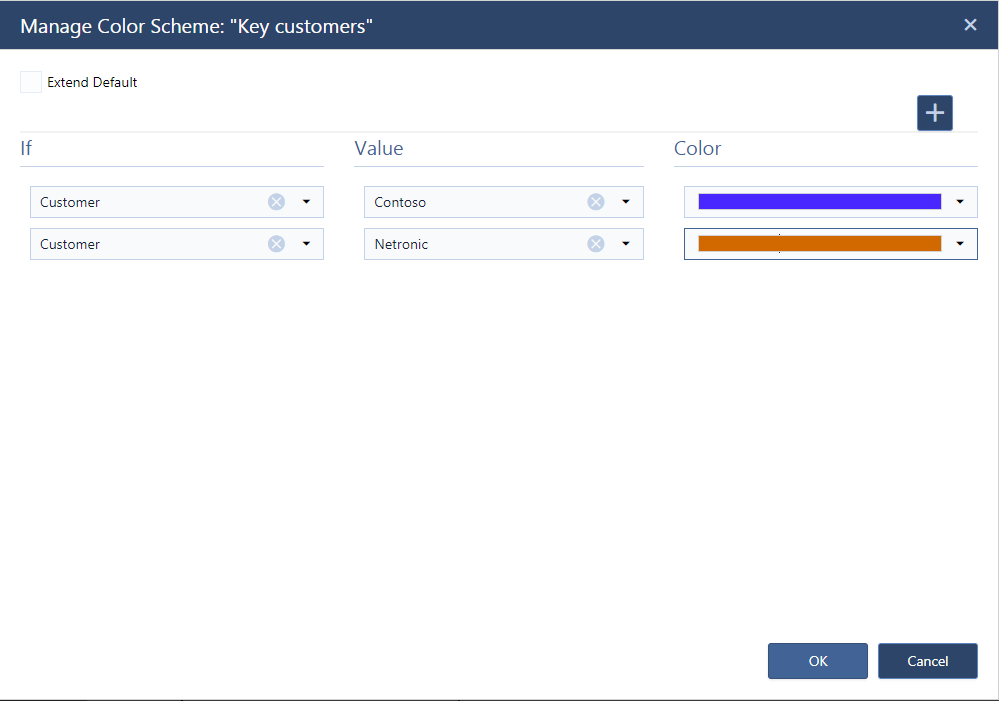
The usage of color schemes will best be illustrated by means of an example. Let's define a color scheme that marks all tasks that belong to jobs of the customer “Contoso” in blue and all tasks that belong to jobs of the customer “Deerfield” in orange.
To do so, click ![]() in the “Settings” area of the menu ribbon to open the corresponding dialog where you can create and edit color schemes.
in the “Settings” area of the menu ribbon to open the corresponding dialog where you can create and edit color schemes.
Create color schemes in the Color Schemes dialog
Create the new color scheme by clicking ![]() and entering the desired name, in this case "Key customers".
and entering the desired name, in this case "Key customers".
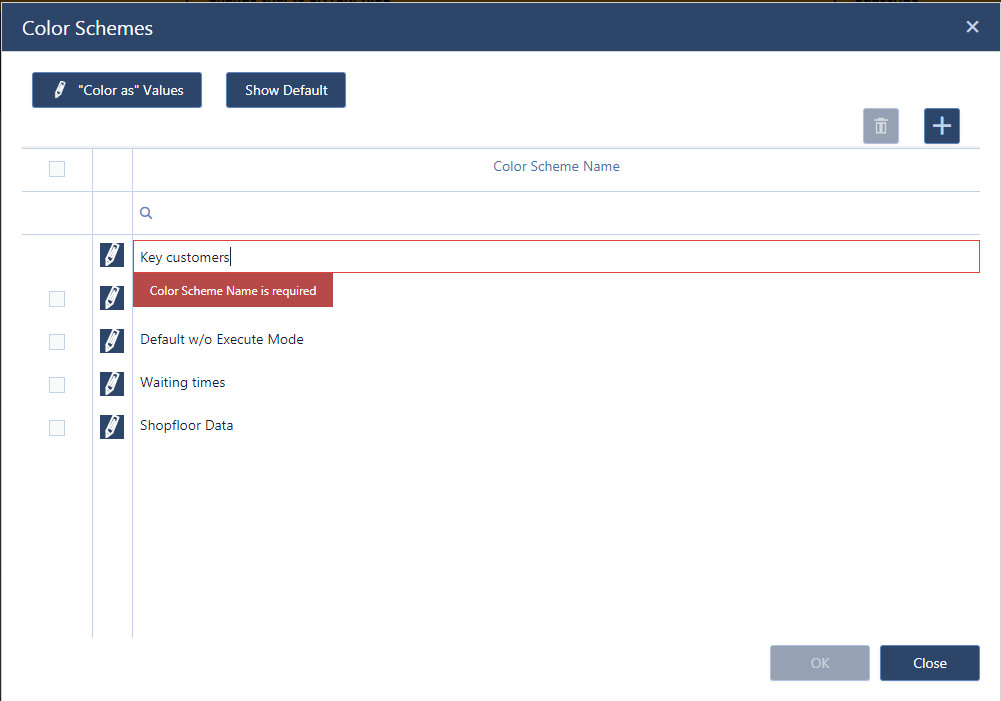
Then, without confirming by OK, click ![]() to open the Manage Color Schemes dialog where you can define the conditions for applying the individual schemes.
to open the Manage Color Schemes dialog where you can define the conditions for applying the individual schemes.
The options of the Color Schemes dialog in detail
| Open the "Manage Color As Values" dialog where you can create or delete "Color as" values which can then be used to higlight particular task-related information/properties. | |
| Show an overview of the default standard scheme coming with just plan it. | |
| Create a new color scheme and enter a name in the red bordered field. The color scheme has to be assigned by selecting it from the drop-down list in the "Highlight" section of the menu ribbon. | |
| Delete one or more color schemes | |
| Open the "Manage Color Scheme" dialog to specify the settings of your color scheme. |
Configure color schemes in the Manage Color Scheme dialog
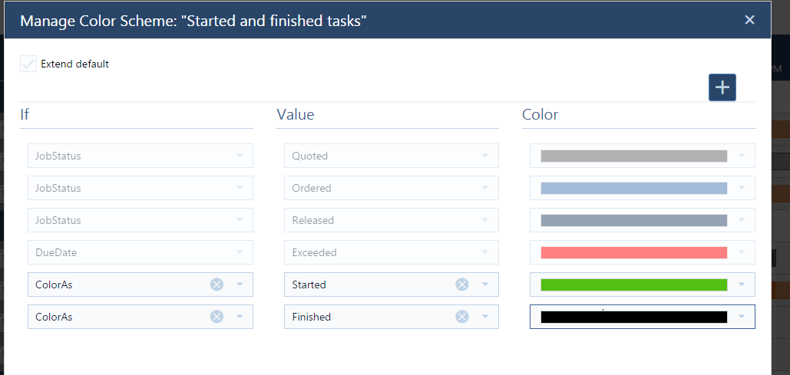
In this dialog you can define up to 10 different rules/conditions for applying colors. Click ![]() for each new condition and specify the desired settings by selecting the appropriate values from the drop-down lists. Note that colors defined here will be applied in descending order, meaning that the rule defined at last has the highest priority and might overwrite the other ones. In case that tasks don't match to any of the individual conditions, it will appear grey.
for each new condition and specify the desired settings by selecting the appropriate values from the drop-down lists. Note that colors defined here will be applied in descending order, meaning that the rule defined at last has the highest priority and might overwrite the other ones. In case that tasks don't match to any of the individual conditions, it will appear grey.
The options of the Color Schemes dialog in detail
|
This will add the default color scheme to your new scheme, meaning that the four default values are listed at the top of the list and your new conditions will be added below them. The default values can not be edited but they will be applied in case your individually created conditions don't have a match in your plan.
|
|
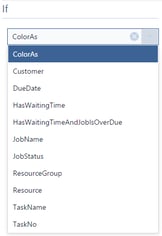 |
Select the field that is relevant for applying the color scheme. |
 |
Depending on the selected "If" field, the "Value" list offers the corresponding values of this field. |
 |
Configure the desired color for this specific condition as described above. |
Apply color schemes
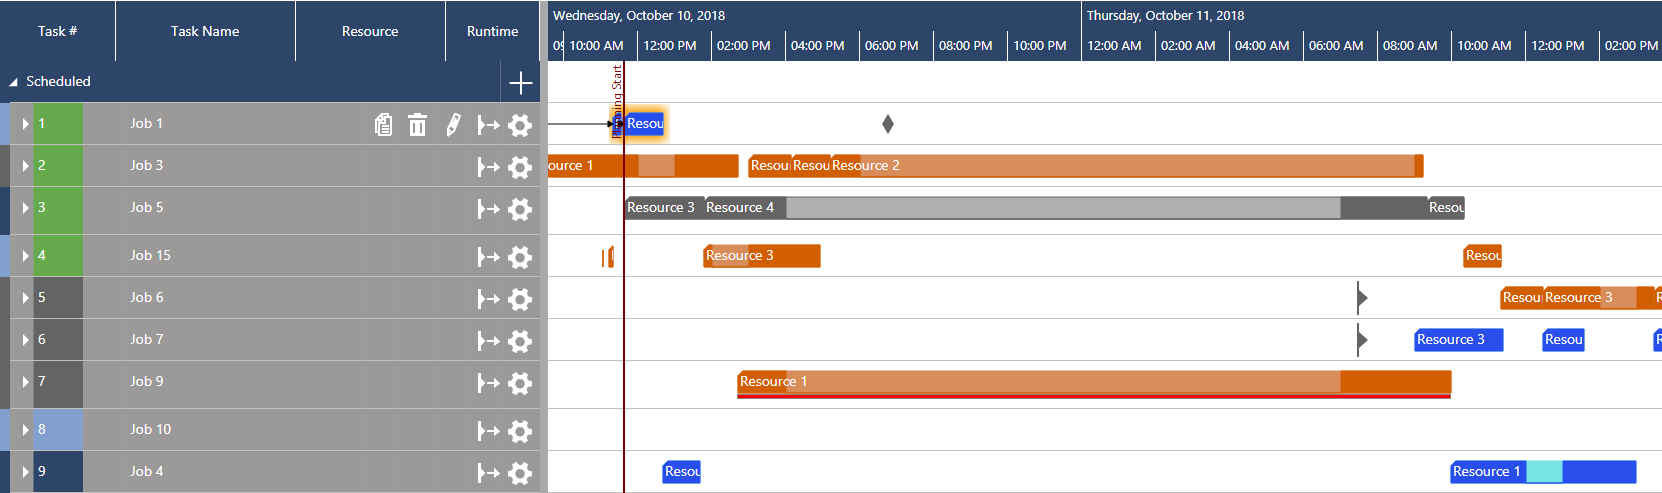
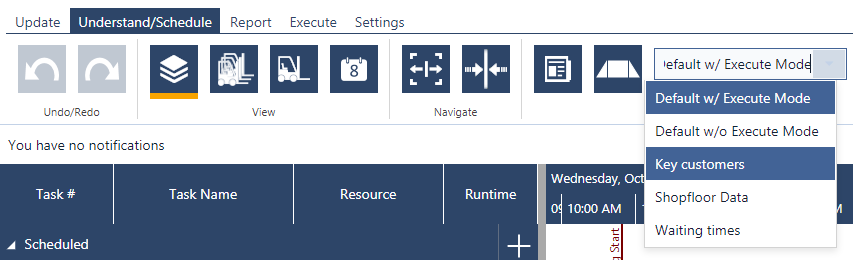
After having confirmed with OK, you have to apply your newly created color scheme to your plan. Select it from the drop-down menu in the Essentials tab:
As a result, your schedule might look like this: