Menu


Here comes the next enhancement of our just plan it software to achieve an easy time and resource scheduling for SMB manufacturers. This time - expected and suggested by many of our users - we ship the capability to add one resource into multiple resource groups. This post shows you how to do this in the application, via the upload from Microsoft Excel, why this makes sense and gives you also a recommendation in the sense of a resource scheduling best practice.
We observed that many of our clients have flexible resources and were not particularly suprised as we as a software company have this as well. For example, we have developers who can either build a web-based product like just plan it or could also work on developing an on-premise .NET custom scheduling application. The same seems to be true for many SMB manufactures who have multi-skilled people who can handle multiple tasks or machines; in addition to this, folks also have machines which can be used for multiple purposes.
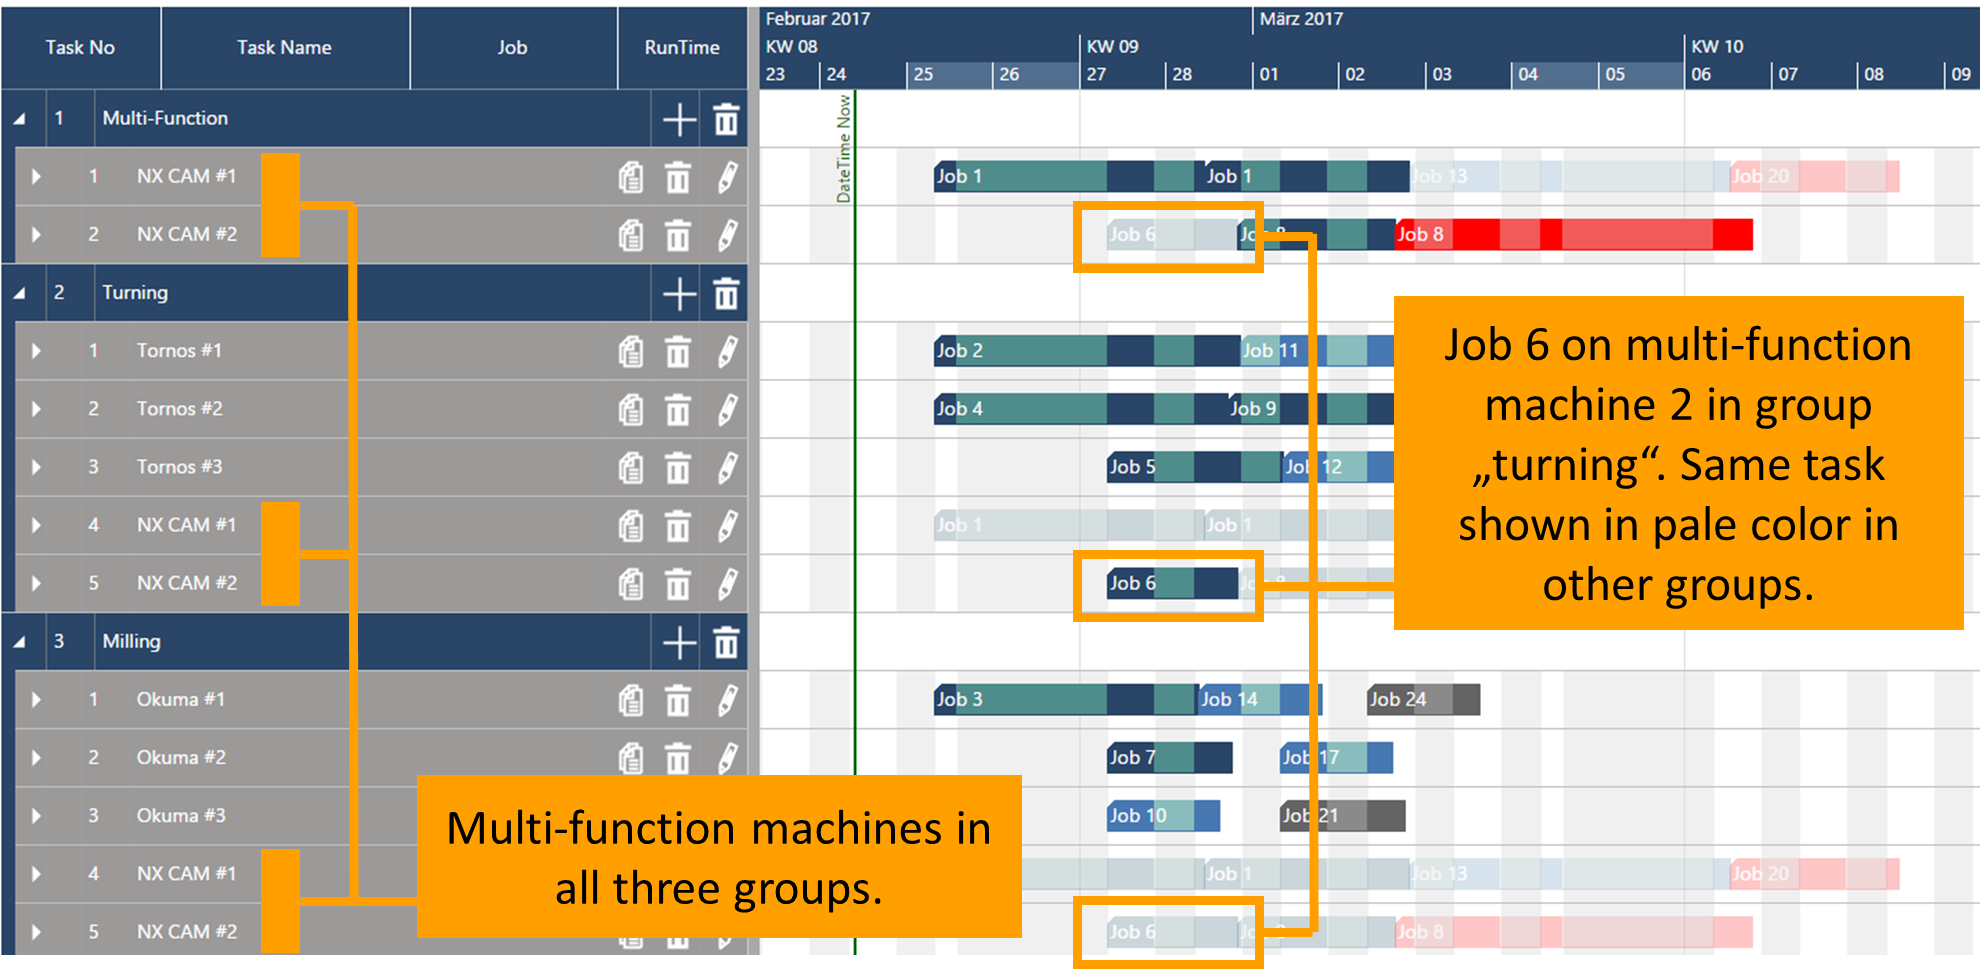
Let's assume the following scenario:
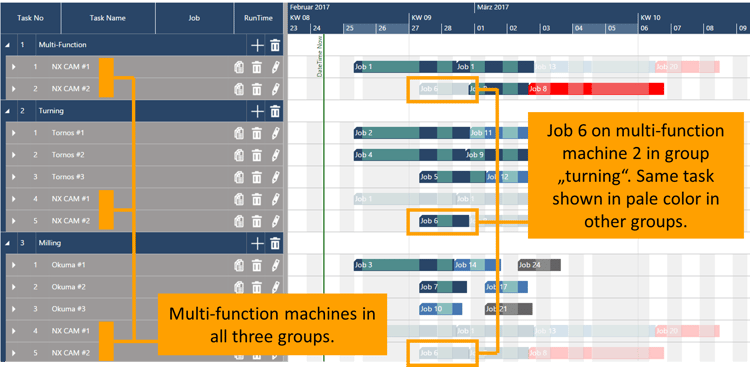
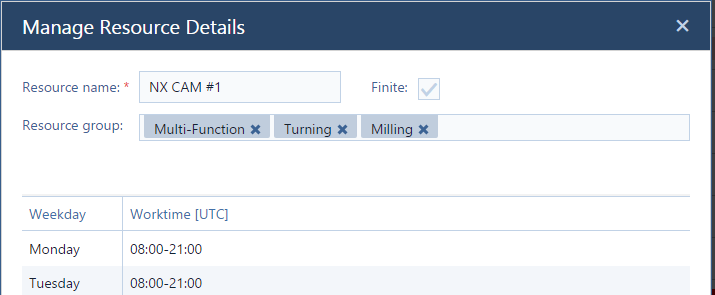
You can assign a resource into multiple resource groups in the "Manage Resource Details" dialog which you can open by clicking the pen icon next to the resource's name. From the below, you can see that we changed the layout of the dialog a bit, and you see that the resource NX CAM #1 had been assigned into the resource groups multi-function, turning and milling.
With just plan it, you can prioritize your resources within one group. That means, the resource that is shown first within a group gets assigned the tasks first, the second resource gets the next task (if the first resource is busy) and so on. If you have shared resources, we recommend that in each group you have the proprietary resources at the top, and the shared resources at the bottom. That way you make sure that the shared resources only are used in this group when all proprietary resources are busy.
Here is a short video to show you everything that I wrote about in this post.
Not yet using just plan it for an easy time and resource scheduling? Why not giving it a try. It's free for 30 days.

just plan it is a production scheduling software plus scheduling tools & best practices to help high-mix low-volume make-to-order manufacturers gain transparency and control over their shop operations. The software plus its methodology is used by thousands of people around the globe. They consistently achieve improved on-time deliveries, shorter lead times, and better utilization of their resources.
As just plan it is not just software, but a lot of processes and best practices, we recommend that you start with an exploratory meeting. If we agree that there is a fit between your requirements and our approach, we'll build a prototype for you.
Hence, it all starts with a meeting. Book that meeting now.

No Comments Yet
Let us know what you think