Menu


As promised in the last product update, this time we continued on our way to enable you to set up email notifications with our new “just plan it event messenger”.
The event messenger is a major step forward, and it closes the gap between the production schedule and key stakeholders (e.g. your plant manager, your CEO, your customer, your supplier, etc.). Ultimately, the event messenger brings your schedule to your inbox. It allows you to focus on information that matters, and to establish a process in which you get triggered to purely manage exceptions.
We created a new app that allows you to directly define (1) those events that you want to get notified about, (2) how often you would like those events are checked, and (3) how frequently notifications are sent. This new functionality will automatically push the critical information to you by sending an alert email message based on the events you define.
This helps managers and planners to get even more transparency of what is happening in the schedule without spending time in the Gantt chart views.
Again, as a quick reminder, this new app as well as our events API is available to enterprise subscribers free of any additional charge. All non-enterprise customers can purchase the service separately as an add-on to their subscription.
Now, let's take a look at what we built for you:
To access the new messaging app directly, you need use this link: https://messenger.just-plan-it.com/
Coming from the main just plan it client, you can switch to the jpi event messenger by clicking the respective icon in Tab “Settings”

For those who are familiar with just plan it, you will see the usual log-in page that you already know, you simply need to enter your regular login details and click on ‘Sign in’.
You will be directed to this page:
Let's take a closer look at what you can see

For those who usually use the just plan it main app, this might look familiar to you, as this works just as the ribbon bar in the main client works. The first button from the left will take you to the main app, the second one will simply log you out.
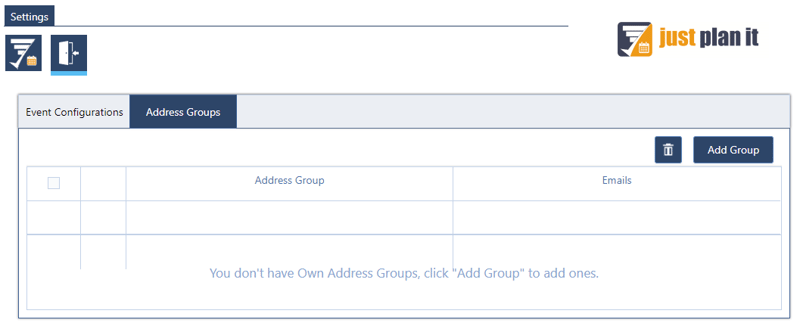
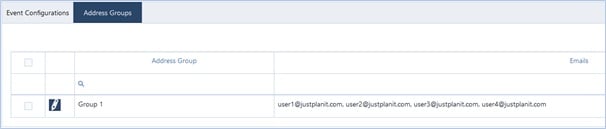
In this grid, a user can add, update or delete an address group. So, what is an address group?
An address group is a collection of emails that when the group is selected as an addressee later on, will receive the event notifications. Let us create our first address group by clicking on ‘Add Group’.
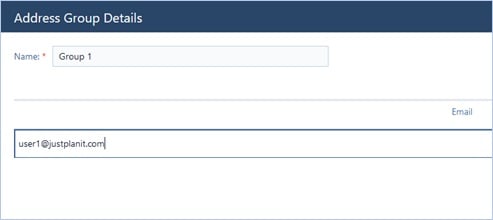
A dialog pops up:
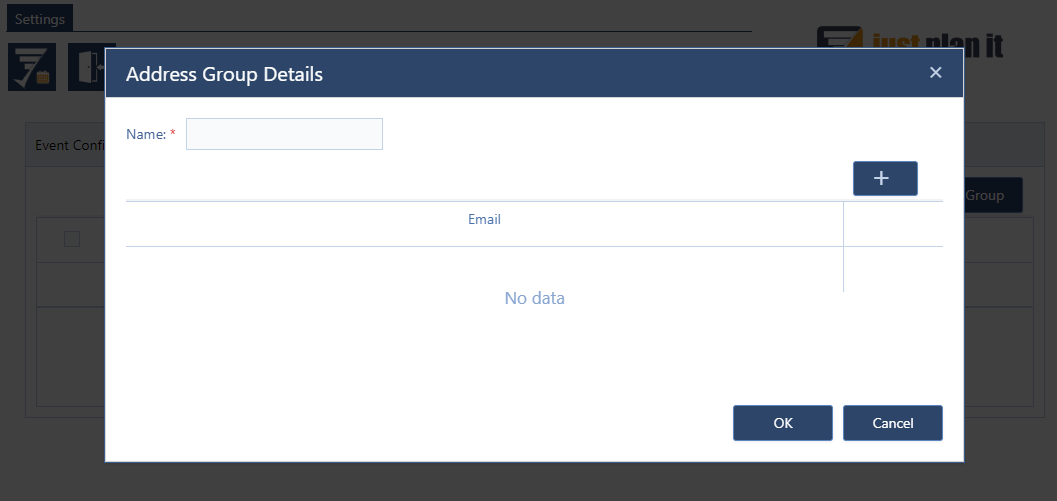
Name is the unique name of the address group.
By clicking on the ‘+’ button, a user can add new email addresses to the group:
Let us add more email addresses and click ‘OK’ to save:
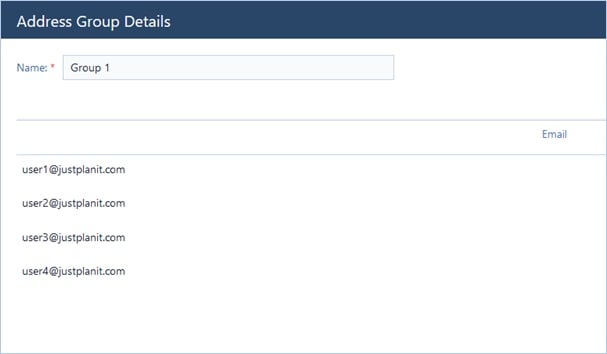
Voilà, this is how it looks like after saving:
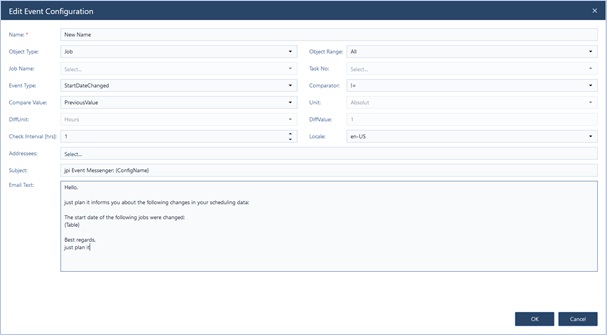
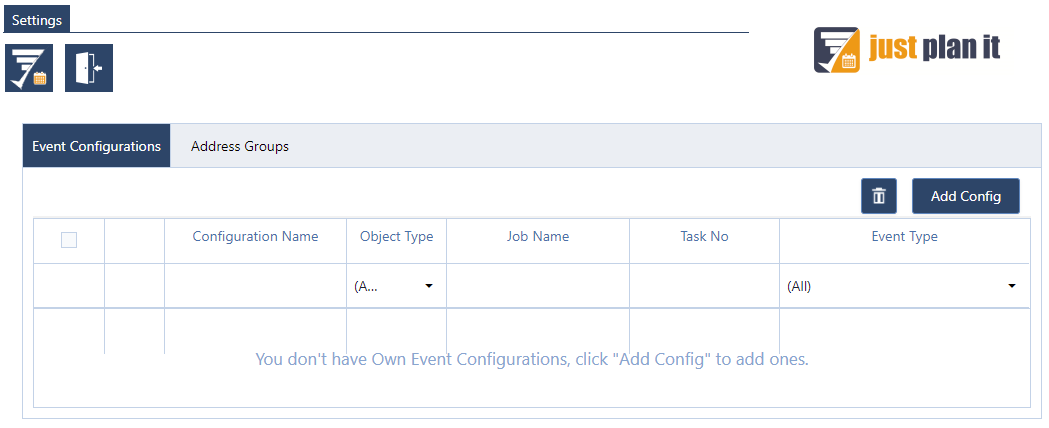
What is an event configuration? An event configuration defines who will get notified about what type of event and the circumstances of when that notification should be sent, as well as at what intervals. Let us add a new one as an example to better explain this:
By clicking on ‘Add Config’ a dialog pops up:
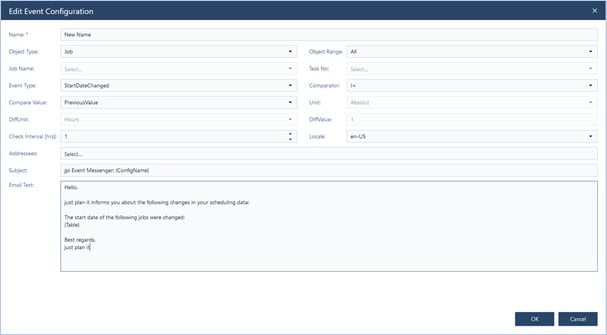
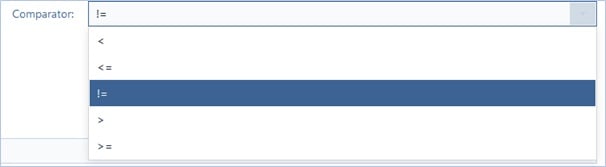


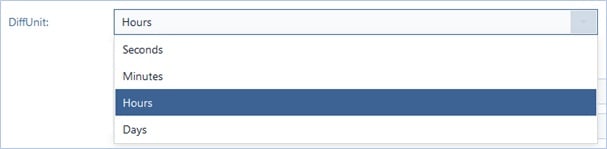

For example, if you select a time laps event type (BufferTimeChanged, CycleTimeChanged, etc.), the comparison will be done based on the selected unit and the DiffValue.
However, if the event type you set is a number (Quantity type), the unit will be neglected and only the DiffValue should have taken into consideration.
These 4 fields are all logically connected and will be enabled or disabled based on your selections so that only working combinations are allowed. If an Editor is disabled its values will be ignored.

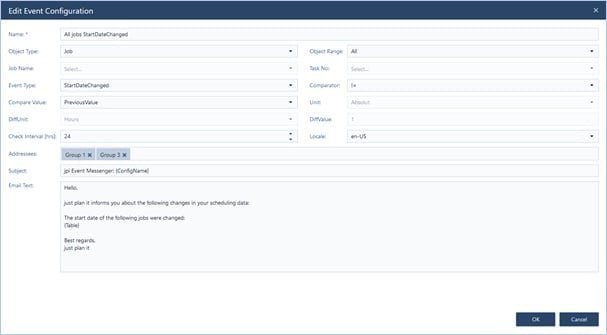
By saving the configuration above, the user expects that the email addresses in the selected groups will receive an email with the written text in the ‘Email Text’ with a table of the jobs that have changed start date (compared to the previous value) in the last 24 hours instead of the {Table} word.
Here is our first event configuration:

Based on the configuration you set, the emails addresses belonging to the selected address groups will receive the following email:
Hello,
just plan it informs you about the following changes in your scheduling data:
The start date of the following jobs were changed:

Best regards,
just plan it
With this new app, we think you will be able to easily set up notifications and directly get alerts in case of specific events in the wide range of your scheduling data happen while you continuously keep the solution updated. If you have any questions about this or any feedback at all we are always happy to hear from you. Also: please watch the recorded webinar from June 2, 2021, when we presented the new function online.
Until then, Happy Scheduling!
just plan it is a production scheduling software plus scheduling tools & best practices to help high-mix low-volume make-to-order manufacturers gain transparency and control over their shop operations. The software plus its methodology is used by thousands of people around the globe. They consistently achieve improved on-time deliveries, shorter lead times, and better utilization of their resources.
As just plan it is not just software, but a lot of processes and best practices, we recommend that you start with an exploratory meeting. If we agree that there is a fit between your requirements and our approach, we'll build a prototype for you.
Hence, it all starts with a meeting. Book that meeting now.

No Comments Yet
Let us know what you think