Automatic mode: Change plan by adding capacity
According to the scheduling methodology being described in the The Automatic Scheduling Mode chapter, the two key parameters for changing the plan in the automatic mode are priority and capacity.
So, if you need to change your plan, you should always try to do so by either changing the priority (sequence number) of the job - this should be your first choice - or to change the capacity.
Adding capacity means increasing the work time e.g. by adding a new shift or by prolonging current shifts, thus accelerating things to finish orders in time.
In our example shown below, with taking into account the current settings, althoug having top priority (= sequence number 1) Job 12 will be late.
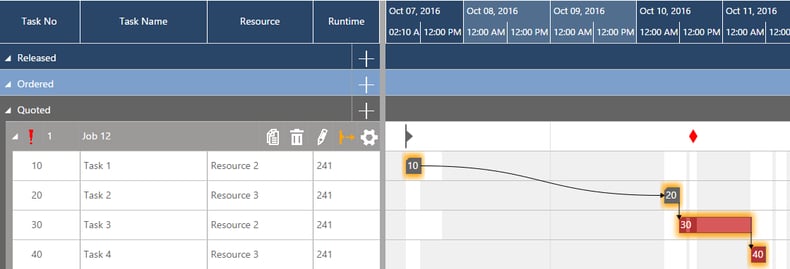
So, as changing the priority will make no sense here, you'd have to increase capacity. The dependencies between the tasks and the working times as indicated by the calendar grid suggest that you increase the capacity of Resource 3, after having checked the resource's capacities in the Resource View:
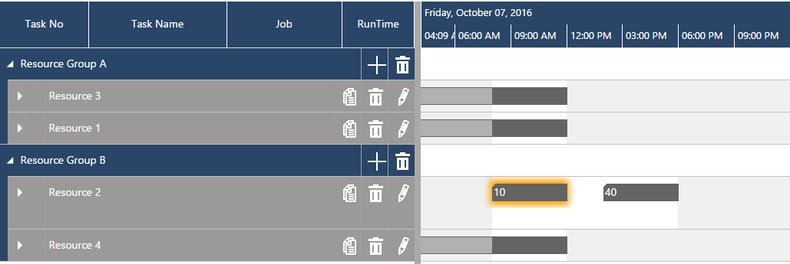
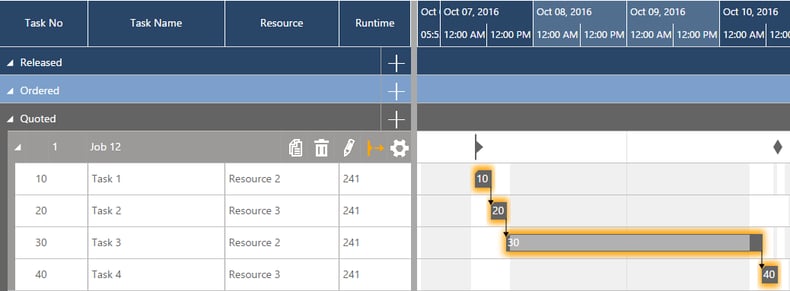
With the Resource View having shown that Resource 3 doesn't have to work off other tasks on Friday, the working times can now be changed to e.g. 8 - 18:00 on 7 October in the Manage Deviations ... dialog which is called by clicking ![]() . Within the automatic mode the scheduling engine will automatically assign the new capacity of Resource 3 to the tasks (here of Job 12). The result of the modified processing times is illustrated in the screenshot below:
. Within the automatic mode the scheduling engine will automatically assign the new capacity of Resource 3 to the tasks (here of Job 12). The result of the modified processing times is illustrated in the screenshot below:
Tutorial video