Menu


As announced in the last blog post we published a new release on July 13th, bringing the functionality to productively schedule “components” to all customers with either the Templates module or a Full subscription.
So, what exactly is new? Short answer: “components” extend the template functionality. Now you are also able to predefine routings of sub-processes related to partial products and add it to job templates as well as to jobs directly. This enables you to easily organize recurring steps of “components” within your business.
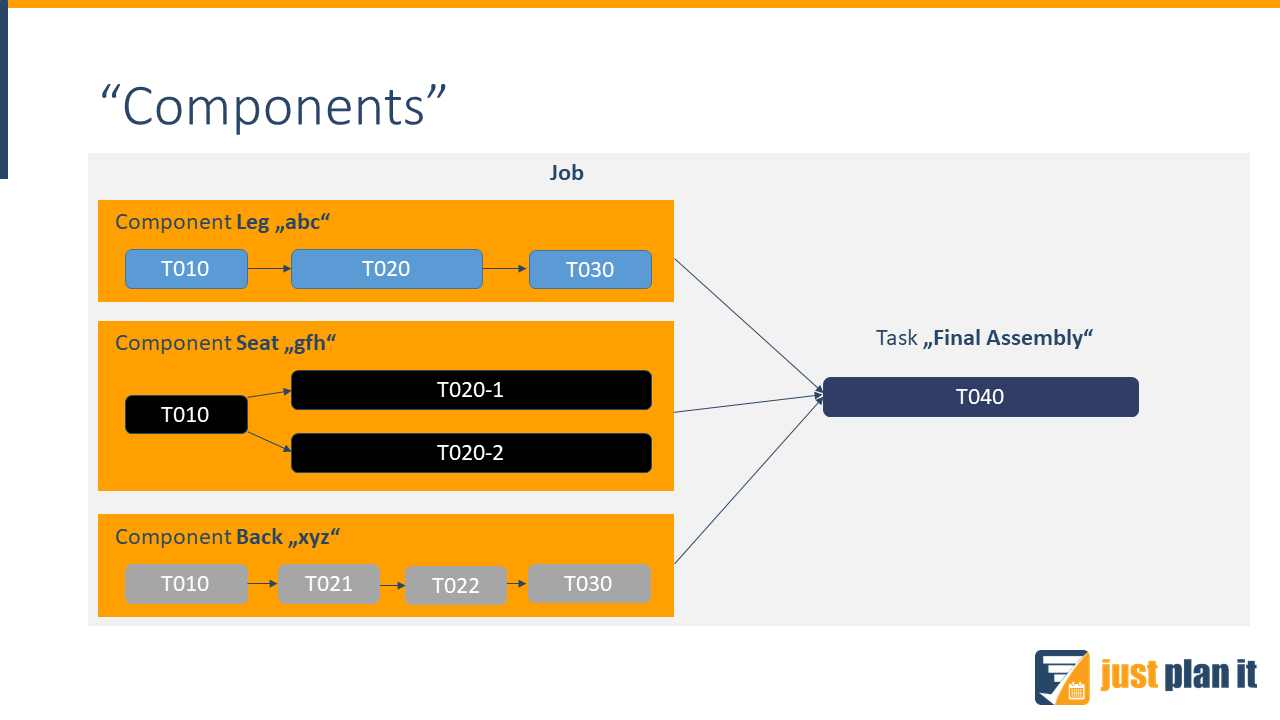
To give an illustrative example: Imagine producing chairs. Each chair consists of legs, a seat and a back. Now imagine the customization of the end product is mainly the result of a certain combination out of a wide range of different components. With the new functionality you can create a component template for every variant of your legs, seats and backs. Then add them to a job template for predefining your “top sellers” or add them accordingly to a dedicated sales order for customized requests.
Now let’s take a look at how to create and use the component functionality from inside just plan it: After opening the template dialog, you will now see two tabs: Jobs and Components. The “Jobs” tab contains all your current job templates and contains all the functionality of the previous version. In the “Components“ tab you can now similarly create your components as creating job templates. Just click on the plus in the upper right corner and the process will be the same.

When clicking the pen icon in the row you created or want to edit, it will open a dialog showing all tasks of the components and give you the option to create, update or delete them as necessary. Again the behavior mirrors the templates here.

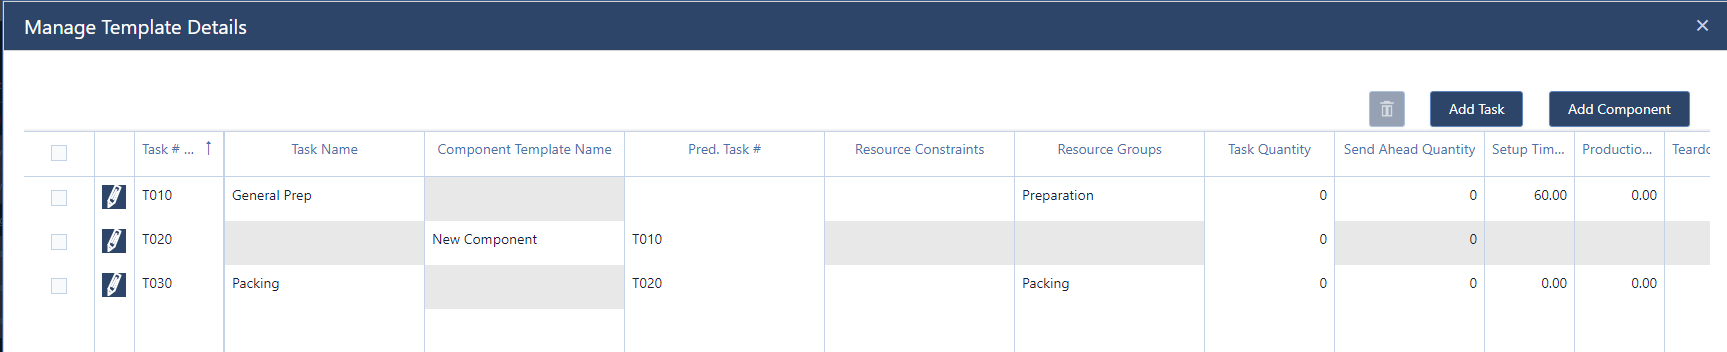
So after creating and building out your components, the next step will be to use them in job templates and jobs. Since the workings here are the same, we are only going to look at how to use them in job templates. Go to the job template you want to add a component to or create a new one and click on the pen to edit the details. You will be greeted by the template details dialog as before, but with an important addition

When clicking the new “Add Component” button you will see a list of all your created component templates. Select the ones you want to add and press okay to add them. This behavior is mimicked in the “Job Details” dialog.

As you can see in the picture below I created two tasks and added a component template.
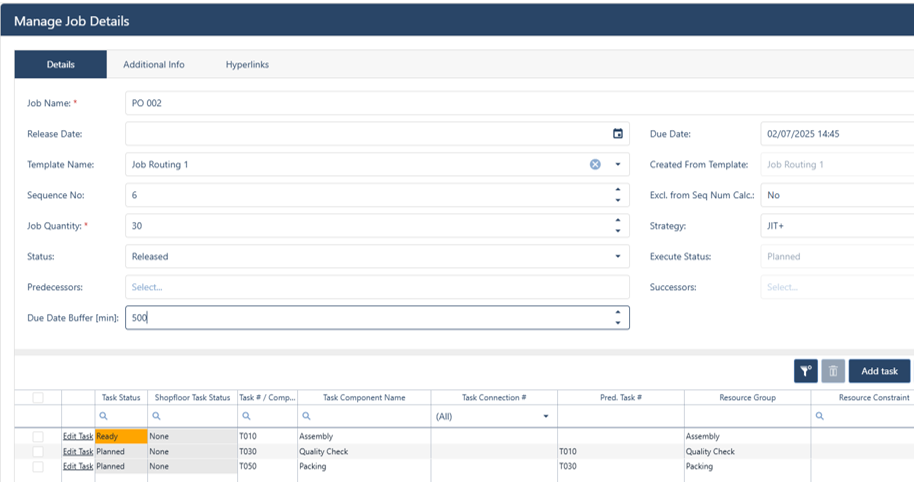
[Within the job dialogue for components you can’t set most of the values you were able to set on tasks, signified by the greyed-out fields, because this was done already in the component template itself. But what you can decide on is the “Task Number” as well as the predecessors and the quantity. A quick word about the quantity: Increasing the quantity of the components will multiply the values set in the component tasks with the quantity set for the component template. Values of 0 are treated as 1.
Regarding the predecessors: You can set a component to have predecessors, they can be either another component or a task. Of course, a component can also be the predecessor of a task. So, now that we have a component and it's being used, let’s take a look at the result in the job view:

[As you can see the new job we created and that uses a component looks exactly as expected. We have only created two tasks and added a component template and just plan it took care of the rest. Generating the appropriate tasks and linking them in the correct order.
You may notice the task numbers for the two component tasks look a bit weird. This is because to signify that they were created from a component template and more specifically which component template they were created from, the task number of those tasks is always:
[Task number of the Component in the Job/Template]_[Task number of the Component task]
This sprint was tough for us on a technical level. The new feature interconnects in so many areas into just plan it, that it was intense for us to install all those connections without hurting the overall functionality. But we are proud and happy to have this out now on time!
We used this sprint as a test run for a new way of structuring our developments. With the successful completion we are very confident that this new methodology will further help us to be even more effective in providing additional functionality to you/our just plan it customers.
That being said, we are currently evaluating and planning the next features and extensions to add to just plan it and we´ll announce a release date very soon.
But apart from this: if you have something that you really want in, please let us know. We are looking forward to extending our list of future enhancements based on your suggestions!
You aren't a just plan it user so far? Why spend more time on maintaining an inappropriate self-made stopgap solution? Why waste more money due to a lack of shopfloor transparency?
Book your meeting with a scheduling specialist now and see how easy you can improve your scheduling with just plan it:

just plan it is a production scheduling software plus scheduling tools & best practices to help high-mix low-volume make-to-order manufacturers gain transparency and control over their shop operations. The software plus its methodology is used by thousands of people around the globe. They consistently achieve improved on-time deliveries, shorter lead times, and better utilization of their resources.
As just plan it is not just software, but a lot of processes and best practices, we recommend that you start with an exploratory meeting. If we agree that there is a fit between your requirements and our approach, we'll build a prototype for you.
Hence, it all starts with a meeting. Book that meeting now.
No Comments Yet
Let us know what you think