Menu


I know that it is not Christmas yet. However, in the spirit of the festivity season, we are happy to provide another gift for all our current customers … and those who consider becoming customers. As of today, we are rolling out the December Release to all just plan it accounts. Again, we managed to enhance our production scheduling software capabilities and again we can say with confidence and pride: “You spoke, we listened”. That means, that the majority of the new features originated from our customers’ and users’ ideas. Let’s have a closer look.
The menu ribbon is your navigation pane through the just plan it production scheduling software. With continuously more and more functions being added, space became somewhat too tight and we decided for establishing tabs in the menu ribbon:
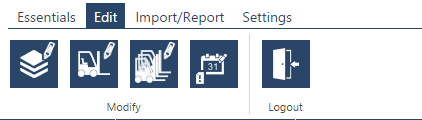
The functions are allocated to the tabs as follows.
Essentials
Edit
Import/Report
Settings
With the last release, we provided you with the function to color tasks that are started (green) and that are finished (black). We now enhanced this “display of work in progress” capability by enabling you to show a dedicated progress/ percentage of completion value on a task’s bar. This value has no influence on any scheduling logic, it is for information purposes only. You can specify the progress in the “Manage Task Details” dialog.
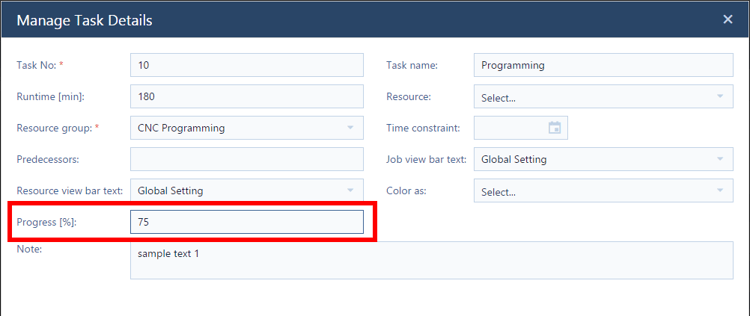
In the visual production schedule, this progress information is represented by a thin green line at the lower edge of the task bar (and by the way is also shown in the tooltip text):
![]()
This is my personal favorite of the current release … and I am pretty sure that many folks will love it. So far, the just plan it production scheduling software has been rather rigid where colors are concerned. Grey for quoted jobs, light blue for ordered jobs, dark blue for released jobs and red for delayed tasks. This is clear and transparent and – according to my personal taste – creates a beautiful looking production scheduling application. However, we also learned that people strongly desire to also have the jobs and tasks bars appear in different colors since different colors might provide different information to different people.
Here is what we introduce with the December release: we give you all the flexibility and power to define color schemes ... using up to 10 different conditions and using just any color you want. Our (my beloved) standard color scheme stays the just plan it default and you cannot change it. But you can enhance it and/or create new schemes.
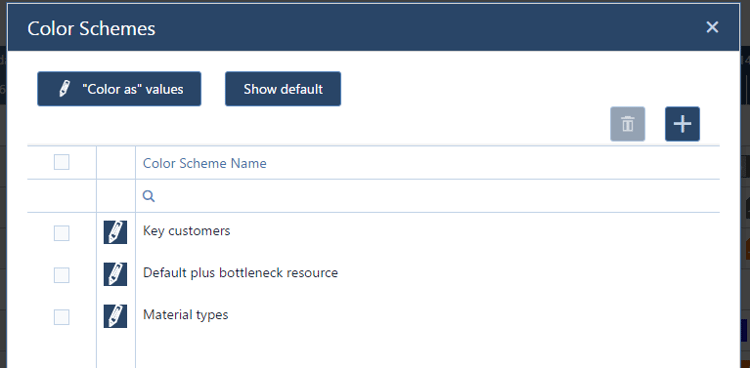
![]() To get going, press the brush icon in the Settings tab. You can then define as many schemes as you like – for example to highlight jobs from your key customers, jobs that run through bottleneck resources, jobs that need a specific material, etc.
To get going, press the brush icon in the Settings tab. You can then define as many schemes as you like – for example to highlight jobs from your key customers, jobs that run through bottleneck resources, jobs that need a specific material, etc.
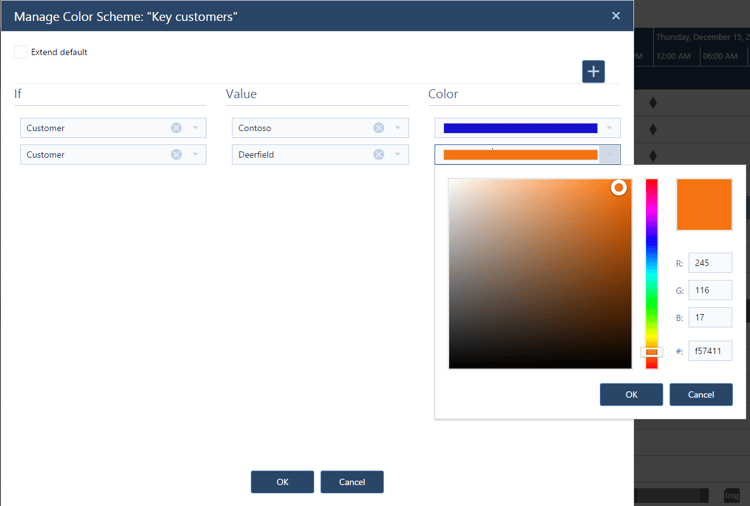
The below screenshot shows you a color scheme that marks all jobs for the customer “Contoso” in blue and all jobs for the customer “Deerfield” in orange.
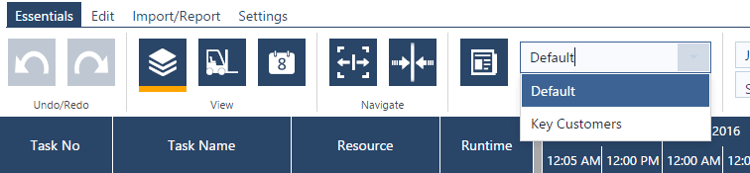
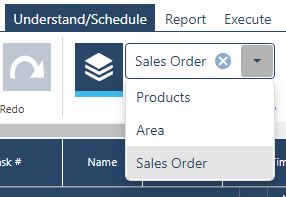
You can select any defined color scheme from a dropdown menu in the Essentials tab. Below you see that the just created “Key customers” color scheme was added to that menu:
Once selected, your visual production schedule might look like this (please note that any job which does not belong to the two highlighted customers is now shown in grey as I did not copy the default color scheme):

If you already think that this is cool, here is what makes color schemes way cooler: when you open the color scheme dialog, you see a tiny button in the upper right hand corner called “color as” values:
Here, you can define any task-related information / property that you would like to especially highlight. Default values are
But feel free to extend this list to as many criteria as are relevant for your production schedule. As soon as you extend this list, the corresponding drop-down list in the "Manage Task Details" dialog will extend as well.
So folks who want to rebuild the initial “color as” functionality with highlighting started (green) and finished (black) tasks (as we introduced in the November release), should define their color scheme as follows:
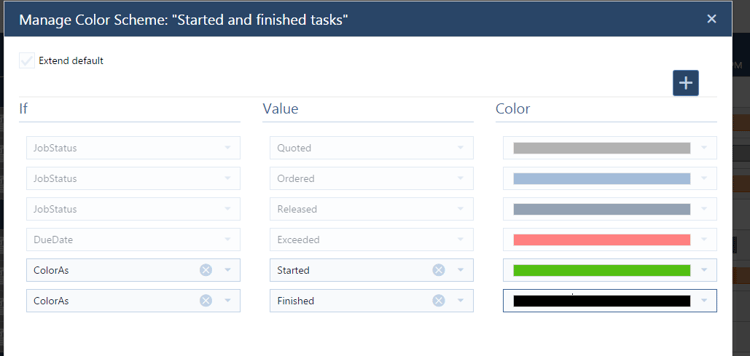
Well, this just should give you a first idea of what is possible with the new color schemes functionality. However, the options are endless: for example, you can define your own criteria that can be used to apply a data-driven coloring to your visual production schedule.
From now on you can change the sequence of orders of resources and resource groups when working in the Resource View.

You can achieve this by clicking the number left to the resource/resource group names in the left hand table of the visual schedule (similar like changing the sequence number of jobs in the Job View). When doing this, please take the following important aspect into account:
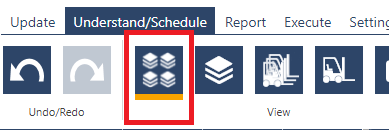
![]() We added a getting started tutorial to the software, which can be started from the Essentials tab by clicking on the icon shown on the left. If you do so, the entire application will scroll down a little bit, and you get access to seven tutorial chapters which guide you through the basics of the just plan it software.
We added a getting started tutorial to the software, which can be started from the Essentials tab by clicking on the icon shown on the left. If you do so, the entire application will scroll down a little bit, and you get access to seven tutorial chapters which guide you through the basics of the just plan it software.
From the tutorial menu, you also have quick links to the written documentation and our video tutorials. If you click the icon again, the application scrolls up again and you can use more screen space for your visual production schedule.
Last, but not least, we enhanced the interface to the just plan it software to Microsoft Excel in a way, that we now can connect to any XLS spreadsheet. We still strongly recommend working with our production scheduling Excel template and we use this template as the default XLS source.
![]() So, if you work with our template, you can continue to upload it via the button shown here, which you find in the Import/Report tab.
So, if you work with our template, you can continue to upload it via the button shown here, which you find in the Import/Report tab.
![]() If you work with your own template, you first have to define the mapping of your spreadsheet with the just plan it data model. This means that you have to tell the just plan it software where to find the required data in your own spreadsheet. As such, you have to start the mapping dialog from the Settings tab.
If you work with your own template, you first have to define the mapping of your spreadsheet with the just plan it data model. This means that you have to tell the just plan it software where to find the required data in your own spreadsheet. As such, you have to start the mapping dialog from the Settings tab.
Here, you first have to select your production scheduling spreadsheet, and then map you data to ours. This is achieved via the following dialog:
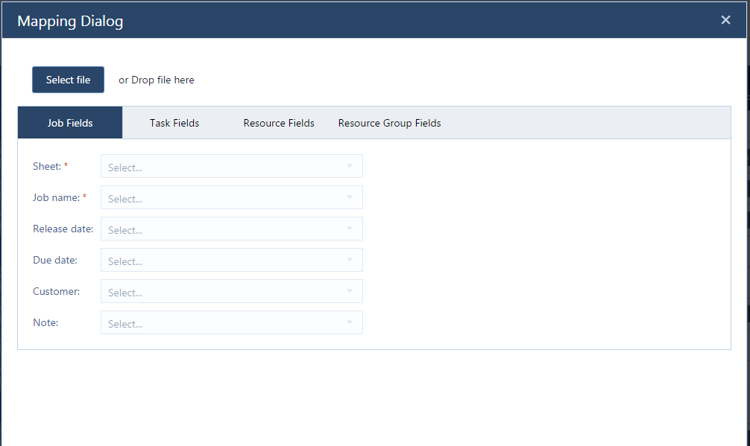
After you have selected your XLS spreadsheet, you have to map your fields to the just plan it fields, which are shown on the left hand side. Fields with a red asterisk (here: “Sheet” and “Job name”) are mandatory fields and need to have an equivalent in your XLS file. Please make sure that you properly walk through the entire dialog, i.e. that you map the job fields, the task fields, the resource fields and the resource group fields. Once your mapping is done and confirmed, it is saved as your new default mapping scheme and you then can upload your sheet directly via the upload button.
That’s all for December: stay tuned for more to come in January.
Not yet using just plan it for an easy time and resource scheduling? Why not giving at a try? The 30-days trial is completely free-of-charge and comes with no obligation.
just plan it is a production scheduling software plus scheduling tools & best practices to help high-mix low-volume make-to-order manufacturers gain transparency and control over their shop operations. The software plus its methodology is used by thousands of people around the globe. They consistently achieve improved on-time deliveries, shorter lead times, and better utilization of their resources.
As just plan it is not just software, but a lot of processes and best practices, we recommend that you start with an exploratory meeting. If we agree that there is a fit between your requirements and our approach, we'll build a prototype for you.
Hence, it all starts with a meeting. Book that meeting now.
No Comments Yet
Let us know what you think