Menu


This means that tasks are allocated - following the sequence number (priority) of their jobs - to the respective resources by making sure that tasks of a higher priority job have resources be assigned earlier than tasks of a lower priority job. So far, the scheduling engine was based on the assumption of finite resources, which meant that one resource could handle just one task at one moment in time. From now on, you also can define a single resources as infinite. To achieve this, you need to uncheck the "finite" checkbox when editing or adding a resource as you can see from the screenshot below. (The default setting is Finite)
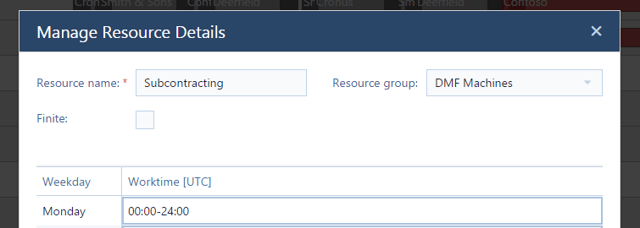
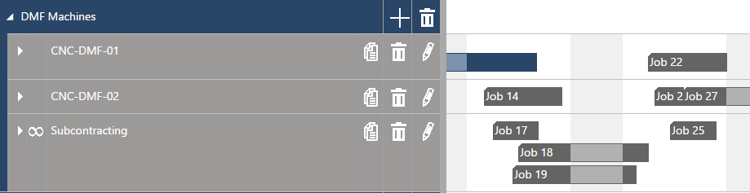
With unchecking the "finite" checkbox, you define an infinite resource. Such an infinite resource can have assigned multiple tasks at the same point of time. Infinite resources are marked with the infinity symbol in the Resource View:
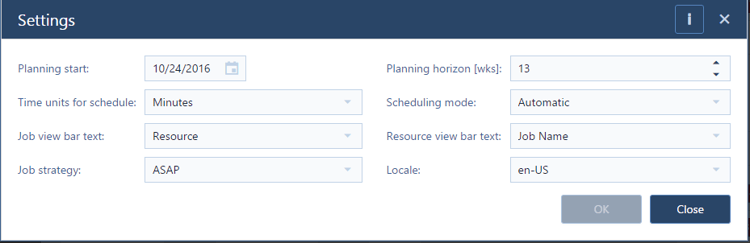
From now on, all production scheduling users of the just plan it software can define different texts to appear on the task bars in the Job View and in the Resource View. For example, you can select to
This is achieved via the settings dialog:
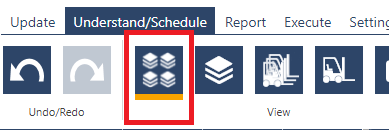
![]() Another new functionality enables all users (BASIC, PRO and ENTERPRISE) to define calendar exceptions for all resources in one go. As reminder, you can access the define calendar deviations dialog by pressing the icon shown at the left hand side.
Another new functionality enables all users (BASIC, PRO and ENTERPRISE) to define calendar exceptions for all resources in one go. As reminder, you can access the define calendar deviations dialog by pressing the icon shown at the left hand side.
Now, if you have e.g. a plant-wide shut down (e.g. for Christmas holidays), you can define this at once via the respective dialog and then tick the "all resources" checkbox.

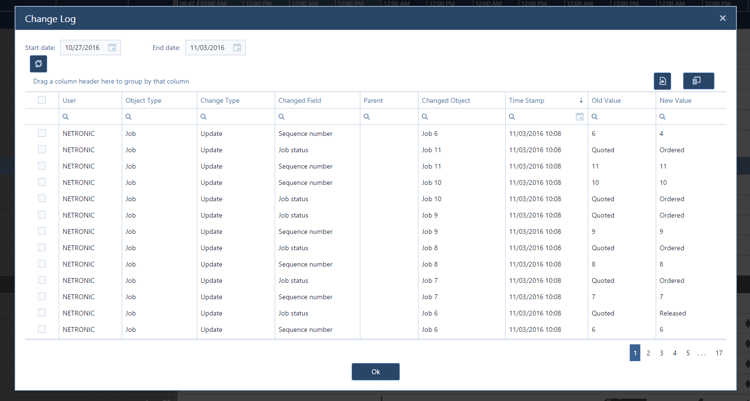
Ever worked with just plan it and wanted to see which changes your colleagues just made to your production schedule? Good news is that we track your every single mouse interaction in the software and that from today all users (BASIC, PRO and ENTERPRISE) can run a report on the change log. Of course, you can also customize the time span of this report and the fields you want to see there.
![]() To get going, click the new icon in the menu ribbon. This brings you to a new dialogue, which works like the recently introduced task and job report builder.
To get going, click the new icon in the menu ribbon. This brings you to a new dialogue, which works like the recently introduced task and job report builder.
It goes without saying that you can also export the change log report to Microsoft Excel and store the data there, or use Excel for analyzing and tweaking the data further.
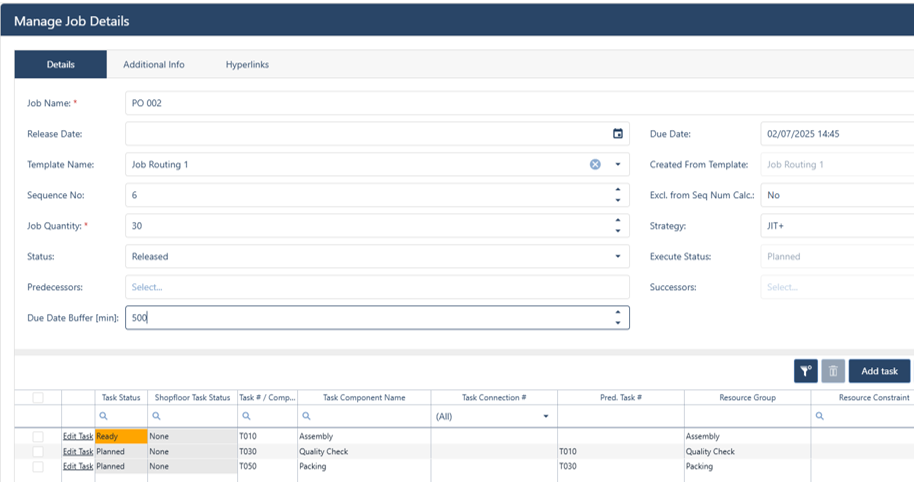
This feature only becomes relevant when working in the automatic scheduling mode with the scheduling engine and hence it applies just to PRO and ENTERPRISE customers. Applying the automatic scheduling mode, drag & drop changes of the production schedule are interpreted as setting constraints. Examples:
So, what is new? Well, now symbols appear when you expand the Job View or the Resource View to let you easily recognize the constraints that have been set.
This is how a task with a time constraint looks like (task no 20):

This is how a task with a resource constraint is flagged:

And here is how you can identify a task with a time and a resource constraint:

As you might know, the just plan it software currently treats all jobs and tasks as planned - in the sense that we do not (yet) have any functionality to mark a job as finished, or mark a task as started and/or as work-in-progress. These task states (started, finished) not only bear a big potential but also bear a big risk to do harm to the ease-of-use of our software, as they will virtually add a kind of real-time execution layer to the current "planning only" layer. Hence, we started analyzing different scenarios and are in the process of finalizing our concept how to add this real-time functionality to just plan it. That means, it is yet to come (not this year, but for sure in 2017).
With this release, we enable all users (BASIC, PRO, and ENTERPRISE) to at least visually flag a task thus indicating whether it is
This is done via the "Manage Task Details" dialog and hence can be specified individually per task:
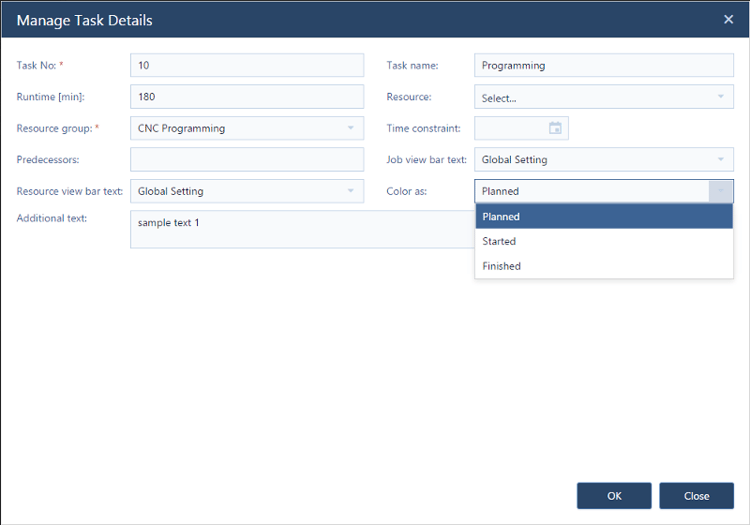
This will lead to the following visual behavior (please note: it is just a color you change; the entire scheduling behavior will not get impacted by this!):

We also enhanced the Settings Dialog in a way that all users (BASIC, PRO and ENTERPRISE) can select between three locales that are applied to the way we show dates and times in the timescale and in the tooltip text. You now can choose between
Last, but definitively not least: I am happy to share with you that we introduce a comprehensive user management functionality to all customers (BASIC, PRO, and ENTERPRISE).
Before I share with you how to access and work with the new user management functionality, there are some important terms to clarify. We differentiate three user modes and two different user permissions.
User modes are:
User permissions are:
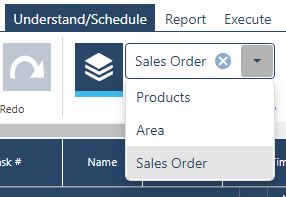
![]() OK. Let's see how you can manage all of this on your own. Start with clicking the new "user management" icon in the menu ribbon.
OK. Let's see how you can manage all of this on your own. Start with clicking the new "user management" icon in the menu ribbon.
As of now, a new tab in your browser opens and brings you to your just plan it user management console:
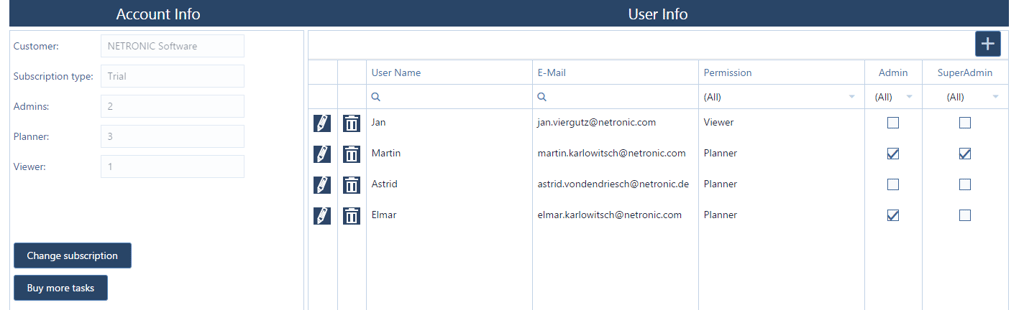
The user management console is split into two areas:
Let's look at this from right to left and see what you can do here, and hence let's start with the user info:
At the left hand side, in the the account info area, you can see some statistics about your account and you have two buttons with which you can upgrade your subscription and buy more tasks to be scheduled in the software. It goes without saying that this will take you directly to our Sales folks ;-)
So, that's it for the November release: we believe that this will further empower the production scheduling capabilities of the just plan it software. Stay tuned for more to come in December. And with this, I wish all customer big fun testing out this new stuff. For those of you, who are not yet a customer, why not giving it a try now?

just plan it is a production scheduling software plus scheduling tools & best practices to help high-mix low-volume make-to-order manufacturers gain transparency and control over their shop operations. The software plus its methodology is used by thousands of people around the globe. They consistently achieve improved on-time deliveries, shorter lead times, and better utilization of their resources.
As just plan it is not just software, but a lot of processes and best practices, we recommend that you start with an exploratory meeting. If we agree that there is a fit between your requirements and our approach, we'll build a prototype for you.
Hence, it all starts with a meeting. Book that meeting now.
No Comments Yet
Let us know what you think