Menu


When we made the rough outline of what we wanted to add to just plan it this year, one thing stood out. As Martin outlined in his blog, we wanted to open up jpi to both give ourselves an easier option to connect to other systems, but also enable customers to build those connections or even other ways of using just plan it by themselves.
With this release, we now publish alongside some small enhancements, the first version of our API for you to connect to. As this is the first step, not all functionality you have by using the graphical user interface is present. But still, is a major step and a great starting point for both you to start connecting to jpi and for us to extend the capabilities of it.
So let's look at the technical elements of it (and what is new in addition to it).
The first thing to know is, that the API requires a key to be sent in a header of each HTTP request.
To get this key, all you need to do is log in just plan it, navigate to the Settings Tab, and open your User Management. Here you will find a new Button “Generate new API Key” with a text field above it. Clicking this, will remove any existing key from our database and generate a new one associated with your account:
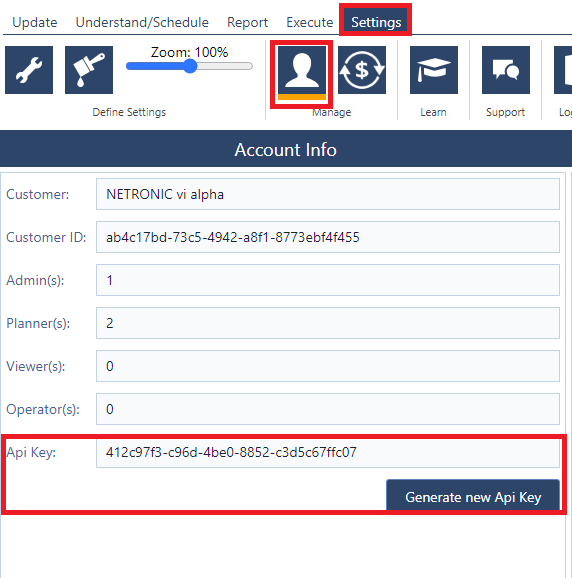
Congratulations, you can now use the just plan it API.
To do so let’s take a look at https://api.just-plan-it.com
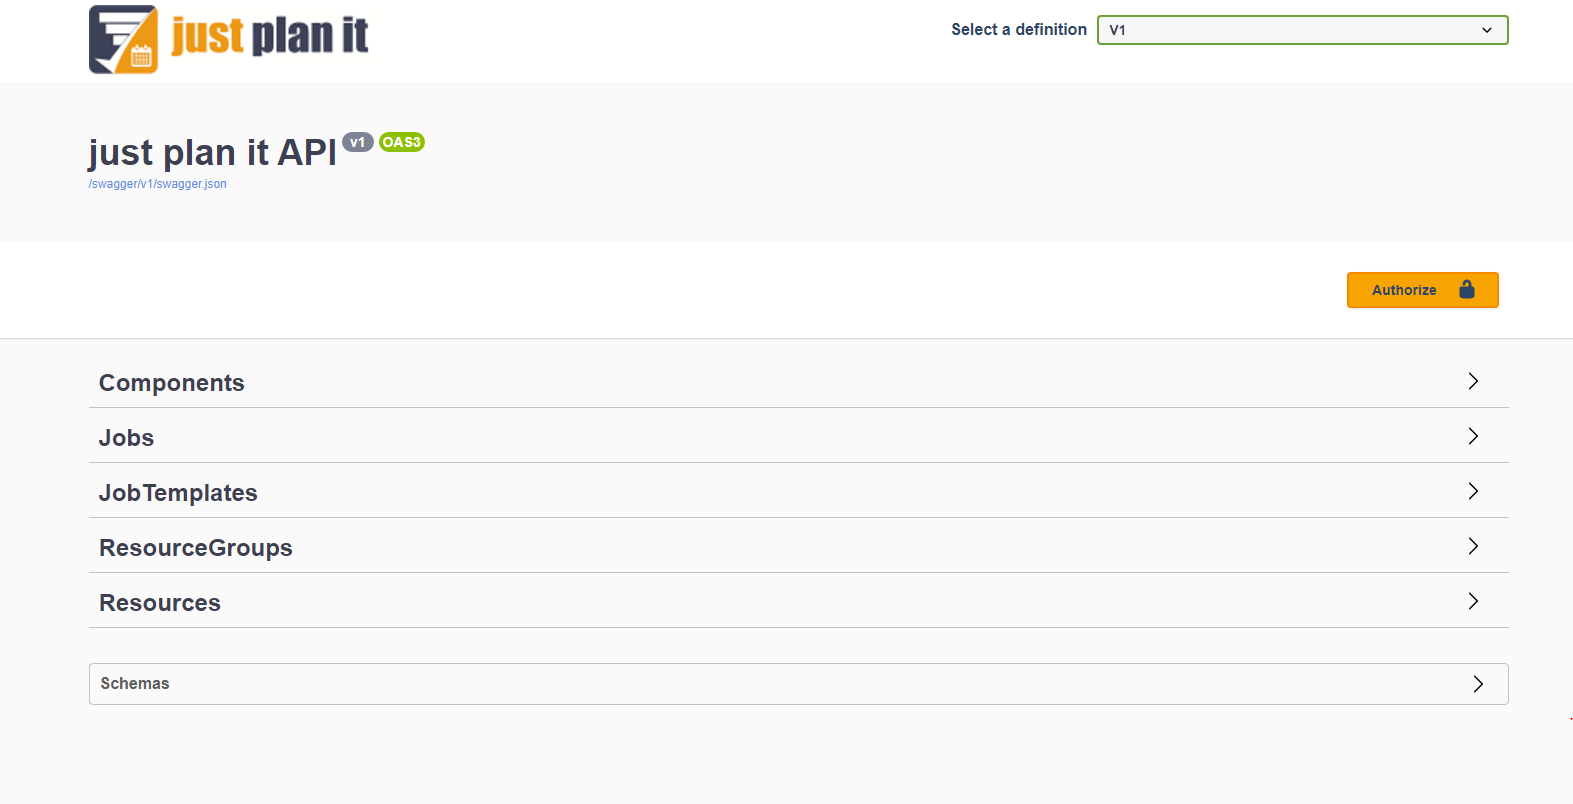
On this site, you can find the explanation for all currently available endpoints, as well as the entire API description in a standard OpenApi format. You can also try out how the requests work.
To try them out you first need to click on the authorize button and paste your API key into the text field:
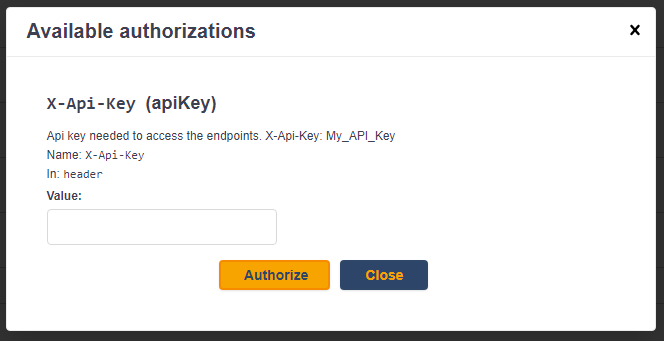
This will add a header the “X-Api-Key” to your requests with your key as the value.
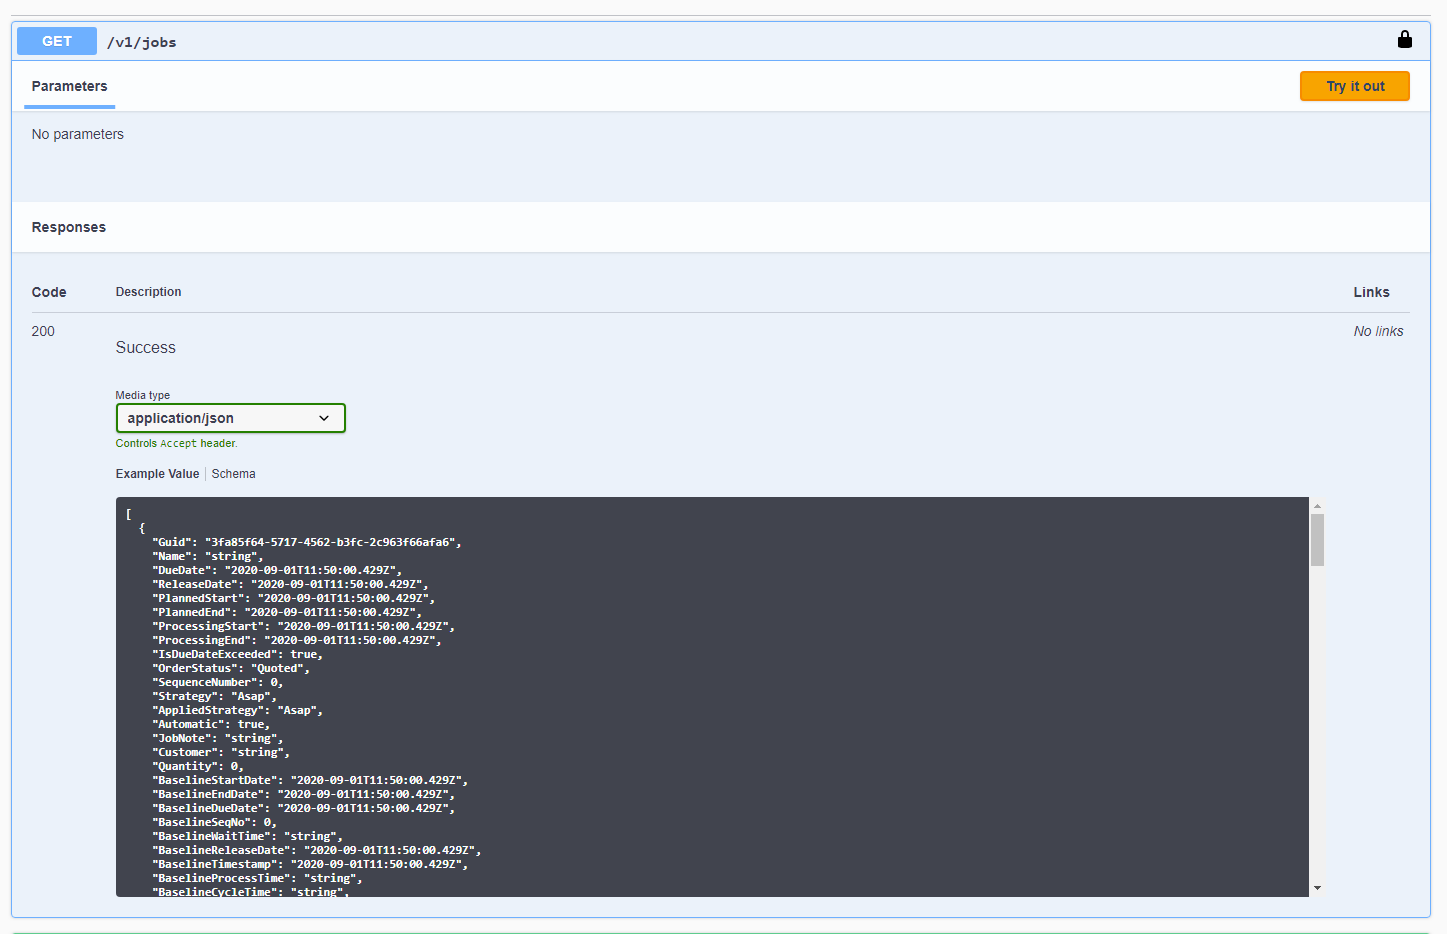
When opening any given object type you will see a list of possible endpoints and request types. Let’s take a look at the endpoints for jobs for example:
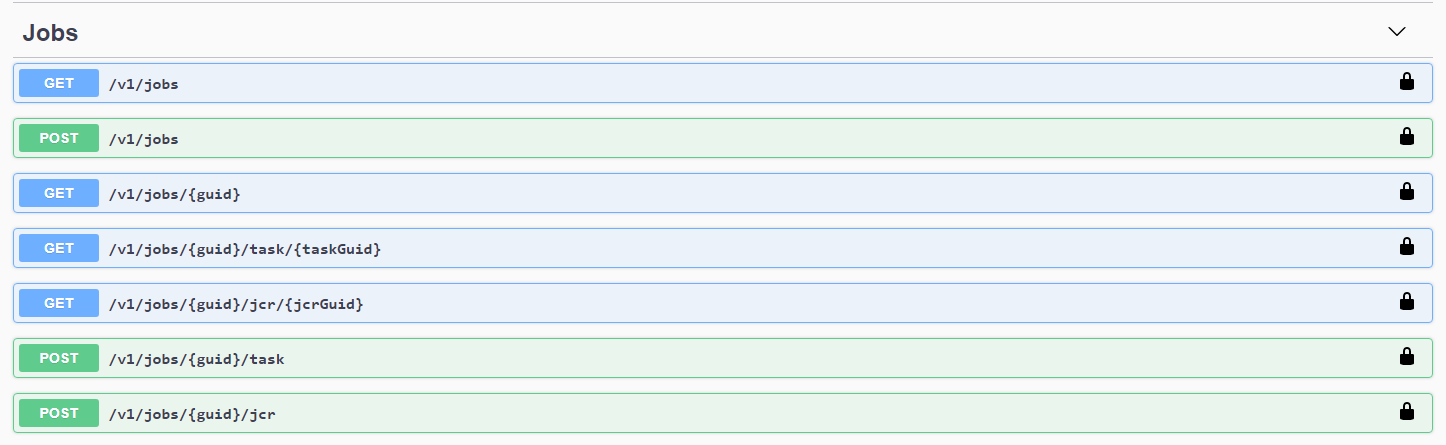
As you can see here, we currently only support GET and POST requests, meaning you can only create new objects and get all objects with all information from just plan it.
In some endpoints, you see the text in {}. This means that you’re supposed to add a value here, in most cases the unique id of the given object. You can get the ids by querying all objects with a GET request and find, for example, the job or task you are looking for.
If you click on any endpoint you will see the following:

This Page allows you to try out a request, show you where the request is sent to, and what the result will look like. If you switch from Example Value to Schema it will show you how the JSON Reply is structured, including comments about each value and its meaning.
In the upper right corner, you can see the “Try it out” Button enabling you to test the requests yourself from this website.
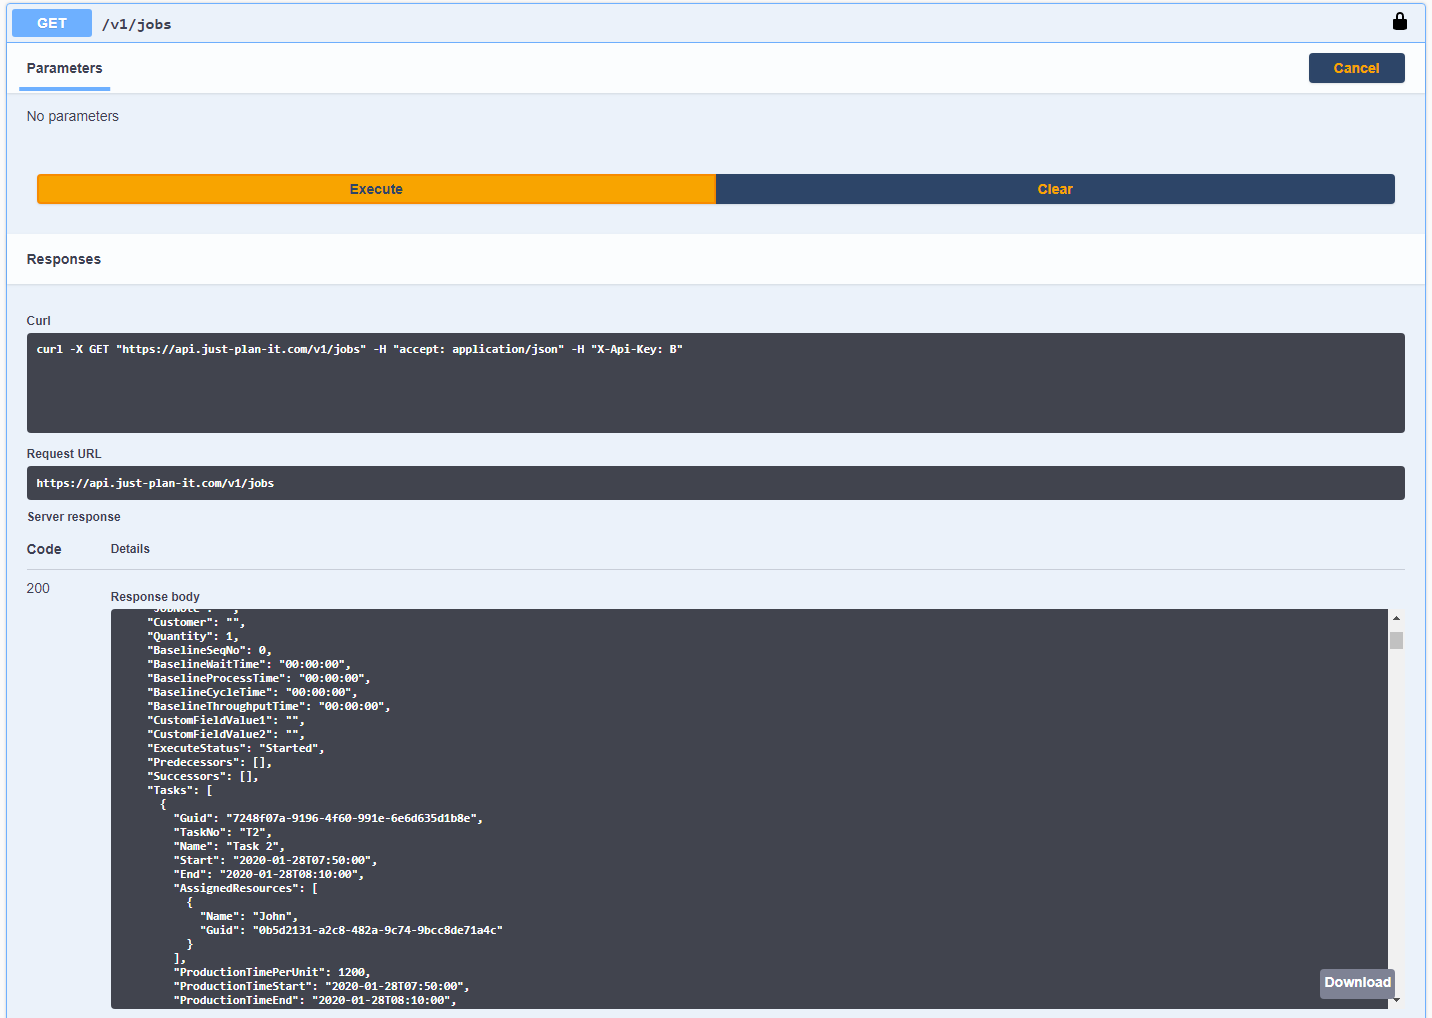
After clicking execute the request will be run. You can see here the exact Request URL used for this request and, under response, you will get the reply. In this case, it is an array of all Jobs in this JPI account. You can also download the reply to work with the resulting JSON in an Editor of your choice.
The results, if successful will always be JSON objects.
This may all sound a bit technical and abstract but don’t worry, this is just a quick view of the API. We provided an in-depth look at how to use the API and use cases for it in the release webinar we did on September 9, 2020 (from minute 8).
While we focused a lot of our time on the API, we also did make some small enhancements to just plan it in general:
When you created a job template, you were just able to set some values defining the tasks and their routing. With this release, we also enable you to set some general job information on templates, namely: Strategy, Job Note, and the job custom fields.

When working with quantities, we give you the option of setting task quantities that differ from the job quantity. This led to the job quantity being basically useless and led to a bit of overhead when trying to change the quantities. With this release, we decided to change this and streamlined this to be in line with how templates work. You can now set the task quantity in a task or job component reference to 0. This will result in the job quantity being used for calculation, just like it works when building a job from a template. Setting the task quantity to any other value will force that value to be taken for this task only, but still giving you the option to update the job quantity and thereby referencing all tasks with 0 quantity.
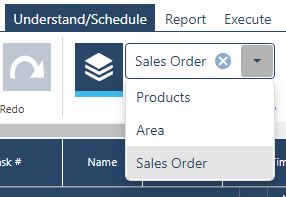
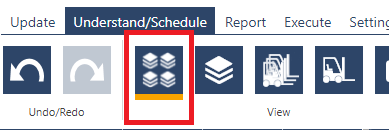
Most of you will know, that you can filter jobs in the Gantt Views by a couple of fields. We now added the option to filter by resource or resource group name:

Those filters are multi-selections, enabling you to filter out all but your most important resources or groups, to enhance focus on your bottlenecks.
In the job view, all jobs are filtered out not containing any task and any of the selected resources/groups.
The bigger change is in the Resource and Resource Group views. Here, only tasks fulfilling your filters are shown and only selected resources and groups are visible. This means you have complete focus on those resources/groups without any other tasks, be it from the same job or not, blurring your vision.
In addition to those functionality upgrades, we of also fixed a few bugs and errors and enhanced our testing capabilities to keep everything running smoothly. We also continue working on making just plan it better and giving you the best possible planning solution.
Happy Scheduling!
PS: Check out the developer resources for your production scheduling API.
Extended API information: watch the recorded webinar
Read also blog post: API enhancements: DELETE and PATCH. Plus improved performance
just plan it is a production scheduling software plus scheduling tools & best practices to help high-mix low-volume make-to-order manufacturers gain transparency and control over their shop operations. The software plus its methodology is used by thousands of people around the globe. They consistently achieve improved on-time deliveries, shorter lead times, and better utilization of their resources.
As just plan it is not just software, but a lot of processes and best practices, we recommend that you start with an exploratory meeting. If we agree that there is a fit between your requirements and our approach, we'll build a prototype for you.
Hence, it all starts with a meeting. Book that meeting now.
No Comments Yet
Let us know what you think