The Execute Mode (PRO and ENTERPRISE Edition)
To understand the purpose of the Execute Mode, let's first have a look at how just plan it works without the Execute Mode being enabled. In that case:
- Every task and job is treated as "planned", meaning that every task and job can get affected by changes to the schedule.
- A task's status can't be set to started or finished, or, in other words: start or end date of a task can't be frozen.
The Execute Mode is a fundamental enhancement of this approach, its purpose being to keep your schedule current by integrating shopfloor data. To achieve this, the Execute Mode enables you to
- get shopfloor data into just plan it easily
- change a task's status to not-yet started, started, or finished
- easily update your schedule reflecting the current state on the shopfloor
The Execute Mode is just meant for setting and approving shopfloor data.
Getting started with the Execute Mode
The Execute Mode is deactivated by default so that you need to switch it on in the "Settings" dialog if you want to use it.
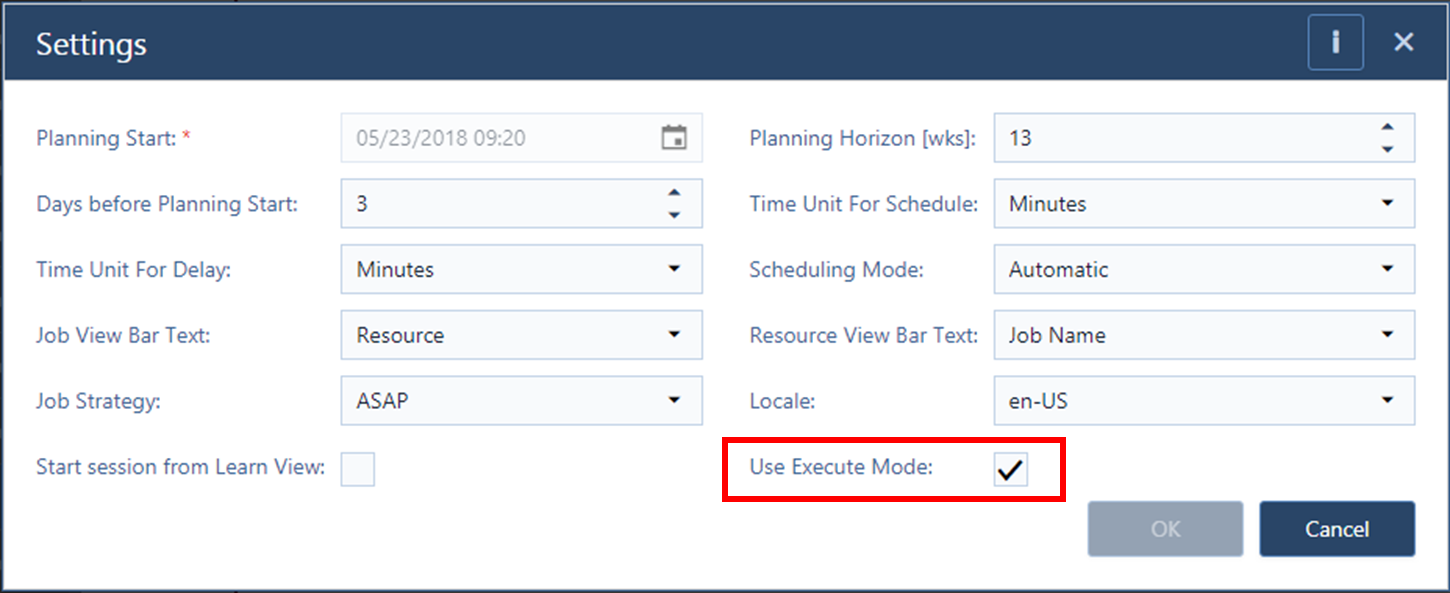
When the Execute Mode is switched on, you can no longer change the planning start via settings nor via drag & drop. The only way to change the planning start is via the pulse functionality (see below).
Working in the Execute Mode
The Execute Mode introduces new elements to your planning:
- User type operator - providing the planner with any kind of scheduling-relevant information from the shopfloor while working in the Operator Client. The operator can only see and set shopfloor data. For a detailed description of the Operator Clients, see below.
- Yellow pulse-to line - representing the date to which the planning start of the entire schedule will be pushed when the planner approves the shopfloor data.
- Icons that have especially been added for the Execute Mode. They are described in the Menu Ribbon chapter.
Working in the Execute Mode basically involves two steps:
- Set shopfloor data: Tasks are updated with information from the shopfloor.
- Approve shopfloor data: The submitted shopfloor data are reviewed and then approved by the planner.
Read below a detailed description of these two steps.
Set shopfloor data
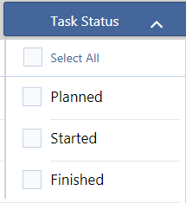
For providing the planner with as detailed task information as possible three additional task statuses are available in the Execute Mode:
| Not-yet started |  |
Provides the planner with a firm information. Can still be moved. |
| Started |  |
Started tasks have a fixed start date and can only get prolonged. |
| Finished |  |
Finished tasks cannot get moved any more and do no longer occupy any resources. |
To set shopfloor data, click the "Execute" tab in the menu bar. Handling and structure of this view is mainly the same as already known from just plan it.
You can:
- toggle between Job View and Resource View
- quickly navigate from one task to another
- provide data from the shopfloor regarding individual tasks
You can not:
- schedule anything. Drag & drop and all scheduling buttons are disabled.
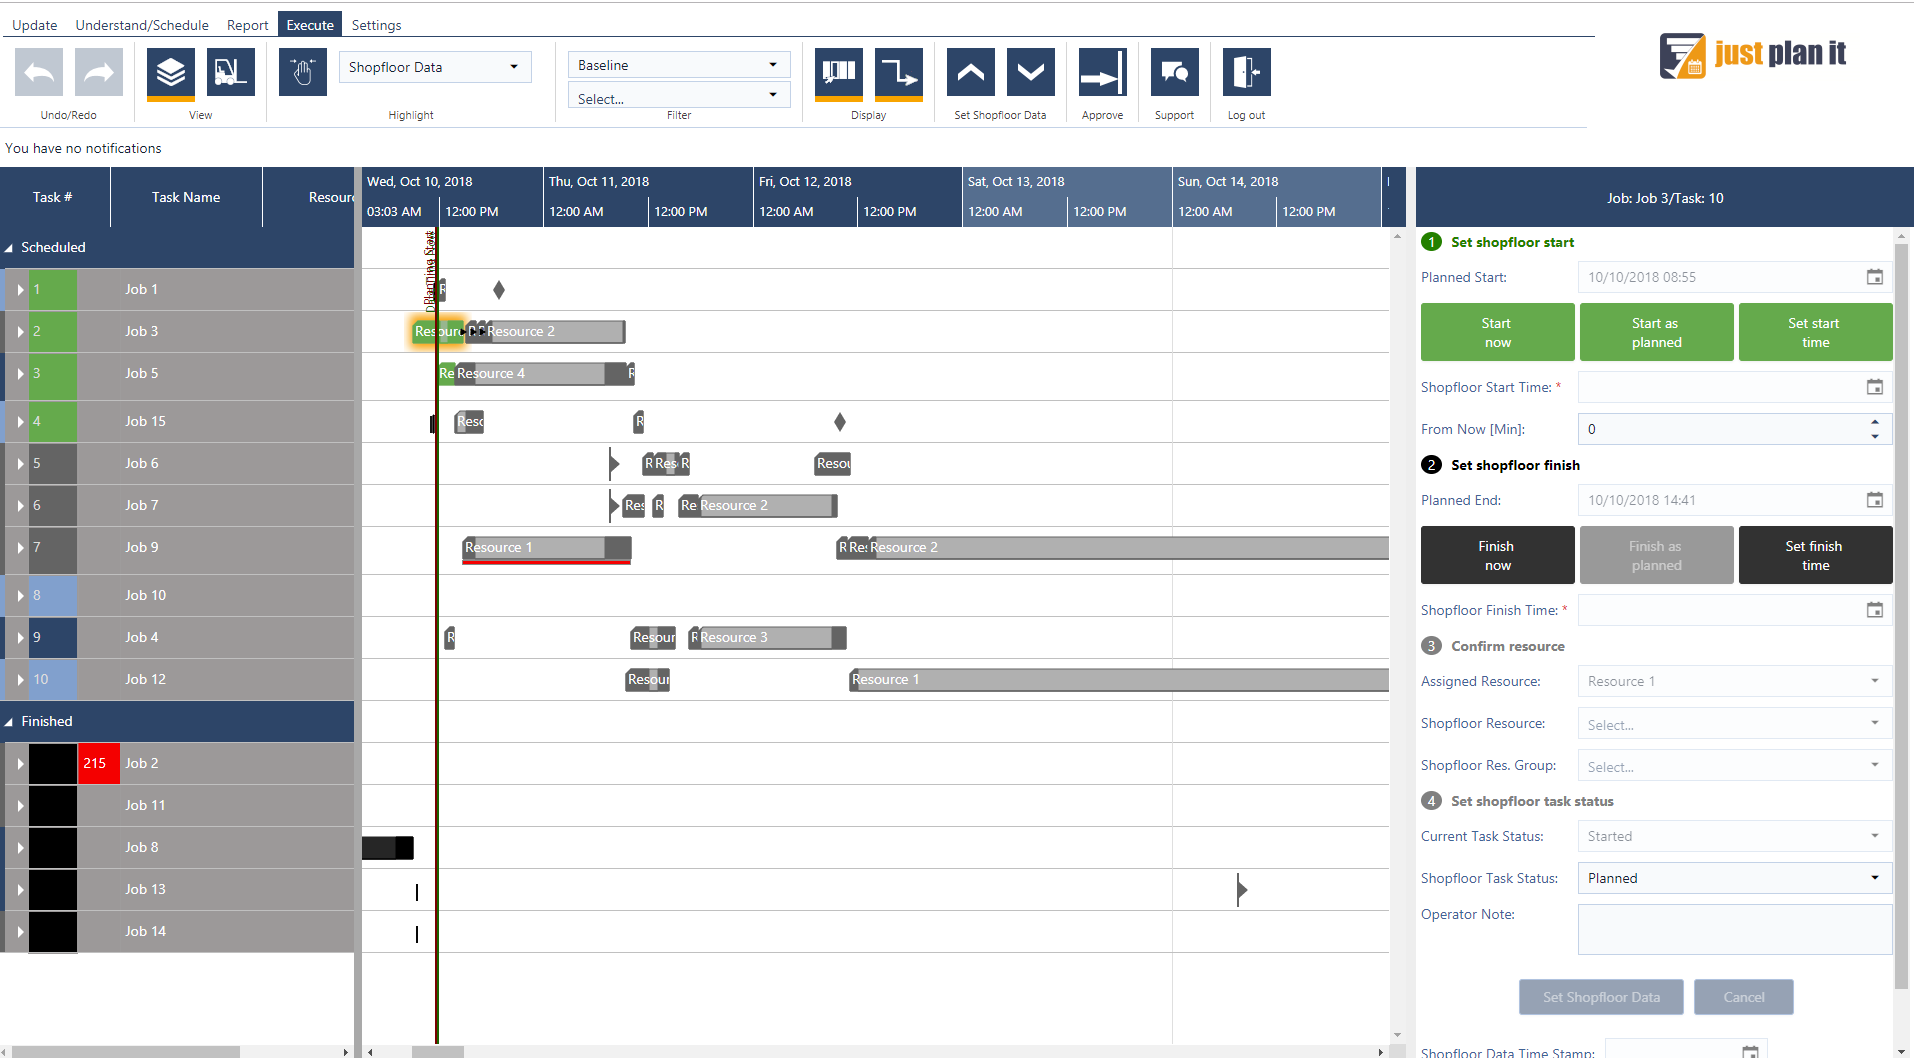
The "Set Shopfloor Data" dialog
In the right part of the "set shopfloor data" stage you can provide the feedback from the shopfloor about the selected task.
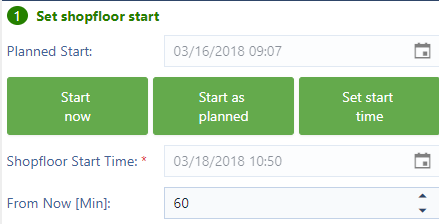 |
Set the shopfloor start date/time by clicking the desired button. The value entered in the "From Now" field reflects the operator's feedback that this task will run another 60 minutes, now here meaning the moment the operator reports this data and not the time/date when the scheduler approves it. Approving this information will not change the pulse-to line. |
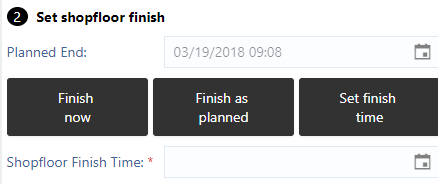 |
Set the shopfloor finish date/time |
 |
Confirm the shopfloor resource |
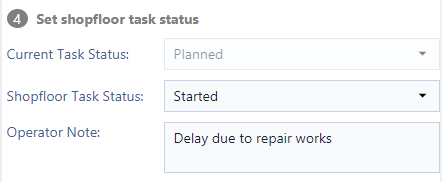 |
Set and change the shopfloor task status |
 |
The time stamp informs you about when an operator last updated the shopfloor data. |
 |
You can see which operator provided the last feedback on a specific task. This information is available when the planner approves shopfloor data via the Execute Mode as well as in the new shopfloor report. |

Please note that all of the information you provide in the "set shopfloor data" stage will be stored in a separate database as long as the planner hasn't approved them.
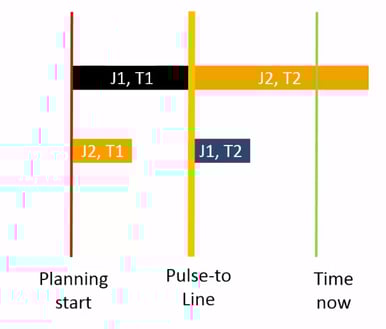
The Pulse-to Line
By clicking "Set Shopfloor Data" the operator provides an important implicit information: The date that represents his most recent feedback. This date marks the date for the yellow pulse-to line. It is the date to which the planning start of the entire schedule will be pushed when the planner approves the shopfloor data.
The Operator Client
Being logged in as operator means not longer seeing the visual schedule, but instead working in an app-style view on any device so that shopfloor feedback can not only be provided from a PC, but also from mobile devices such as tablets and smartphones.
The Operator Client is especially designed for providing shopfloor feedback, therefore hiding the visual schedule and instead listing jobs and tasks scheduled for their resources and so enabling the operator to act on them accordingly.
The task list
When logging in, the operator initially sees the list of tasks that are scheduled for the resources that he is responsible for. The according resources can be specified in the user management.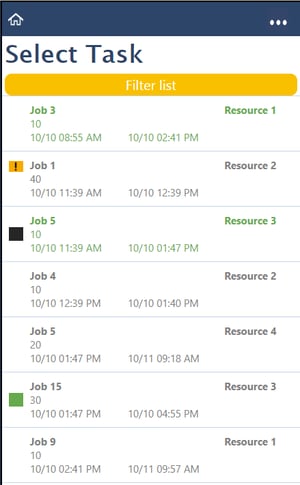
Informations and options of the task list
| Line 1: | Job name and assigned resource |
| Line 2: | Task number |
| Line 3 | Planned start date, planned end date, planned runtime |
| Feedback is missing - based on the current "pulse-to-line" | |
| The operator has set this task to "finished" but the planner has not yet approved this | |
| the operator has set this task to "started" but the planner has not yet approved this | |
 |
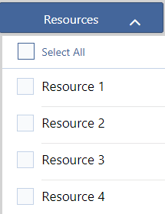
By clicking this button filters can either be applied to
or
|
| Log out | |
|
Open tasks |
Tasks can be opened by touching (or clicking) the respective line. |
The "Set data" dialog
Once a specific task has been selected, the view of the Operator Client changes and the operator can take action in the "Set Data" dialog as described in detail above for the planner's "Set Shopfloor Data" dialog. |
Set the remaining runtime from now. |
 |
Set information about the finish time. |
 |
Provide information about the resource that is actually carrying out this task on the shopfloor and give information about the task status. |
 |
An operator note can be added, basically meaning sending a message to the planner about this task. |
| Goes back to the task list. | |
| Opens an info window with more details on the selected task. | |
| Log out |
Working with the Operator Client happens from www.just-plan-it.com so that you do not need an additional app.
Approve shopfloor data 
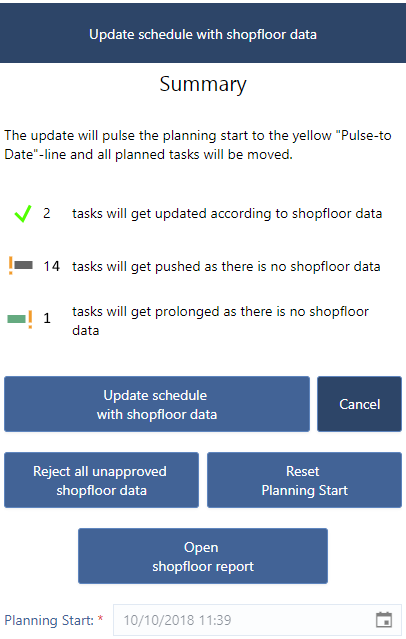
Approving the shopfloor data triggers an automatic update of the schedule, which we call "pulse" and by which your schedule will get pulsed to a new planning start (line). The new planning start represents said date of the most recent shopfloor information.Shopfloor data that are still "to be approved" are indicated by the "Enter Approval mode" notification icon which is placed both in the Essentials tab and the Execute tab. If you click this icon you get a summary on the data you have and on (potentially) missing data.
The options of the summary in detail
 |
The number of tasks marked with a green check mark will get updated according to the shopfloor data. |
 |
The number of tasks marked with a gray symbol will get pushed to the yellow pulse-to line as there is no shopfloor data at all. |
 |
The number of tasks marked with a green symbol will get prolonged as they are started and should be finished by the date represented by the pulse-to line. |
 |
The entire schedule is updated by pushing the planning start to the pulse-to line. |
 |
Reject all the operators' updates in one go. |
 |
Resetting the planning start (by a date/time picker) means that the current planning start becomes the new pulse-to-line and all the tasks between the old planning start and the newly defined planning get set back to the last update being given by the operator (in some sense, you de-approve this operator information). |
 |
The planner can run and export a report that provides multiple information about the shopfloor status of the jobs and tasks |
 |
Brings you back to the "Set Shopfloor Data" dialog without updating any data. |
The two steps of the Execute Mode are precisely summed up in this short video:
Further information
Since the Execute Mode is a quite complex functionality we have provided for you lots of further support material.
Video tutorials
We strongly recommend to watch our video tutorials about the Execute Mode which in a compact and concise way will make you familiar with the major concepts of working with this powerful mode:
Task status
Pulse-to line
Approving shop floor data
Approving and pulsing
Webinar series
Our recorded webinars present you with a demo and an explanation of the Execute Mode.