Create & edit resources and resource groups
The just plan it software offers various ways of creating and modifiying resources and resource groups that are described in this chapter.
Create resources
There are two ways to create a new resource:
- No matter which view you are currently working in, click
 in the menu bar to open the "Manage Resources" dialog, then click
  and enter the details of the new resource: (For a detailed description of this dialog see further down "Edit resources").
- Switch to the Resource View and click on next to the resource group name to open the "Manage Resource Details" dialog. Enter all needed data and and click OK.
Edit resources
In addition to creating resources, the "Manage Resources" dialog can also be used to edit resources.
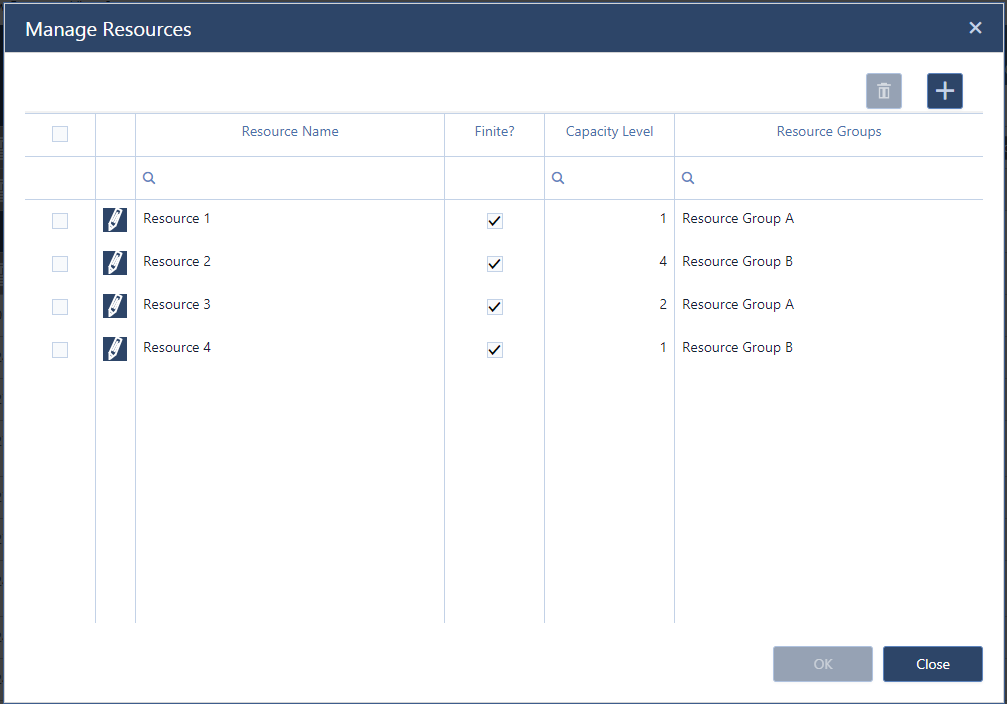
In this dialog, you get an overview of your resources and you can edit them.
The dialog's options in detail
| Sort the resources by name or by resource group in ascending or descending order by clicking the according table header. The sorting order will be indicated by an arrow symbol pointing in the according direction. | |
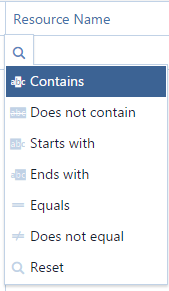 |
Filter the resource list by entering the criteria in the search field next to the magnifyer icon. |
|
|
Define a resource as infinite by unticking its corresponding checkbox, so that this resource can be allocated to unlimited tasks at one time.
|
 |
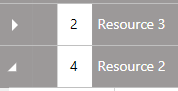
Specify a capacity level if needed (also see above, "The Manage Resource Details" dialog). The capacity level can be defined as an integer value. A resource with a higher capacity level can complete the same task faster than a resource with a lower capacity level. That means that you do not need to schedule down to a single resource, but than you can cluster some resources into teams. A dedicated capacity level (i.e. other than the default 1) is indicated in the Resource and the Resource Group view by a white box right next to the resource numer in the table area. This option can also be set in the "Manage Resource Detail" dialog (see further down "Edit a resource's working time details")
|
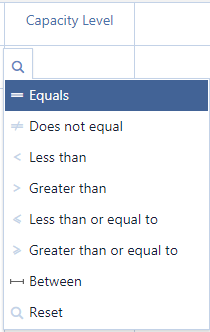 |
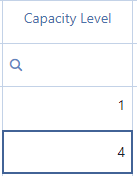
Filter the capacity level list by entering the criteria in the search field next to the magnifyer icon. The field Capacity Level offers a list with relational operators to select from when you point to the magnifyer icon without clicking. |
|
Delete one or more resources. |
|
| Create a new resource | |
| Call the "Manage Resource Details" Dialog to see and modify the working time details of a resource |
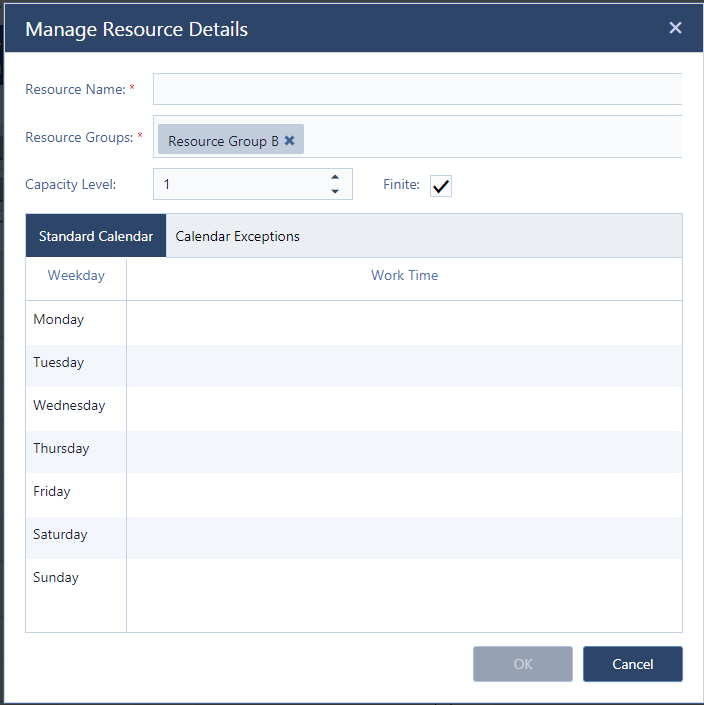
Edit a resource's working time details
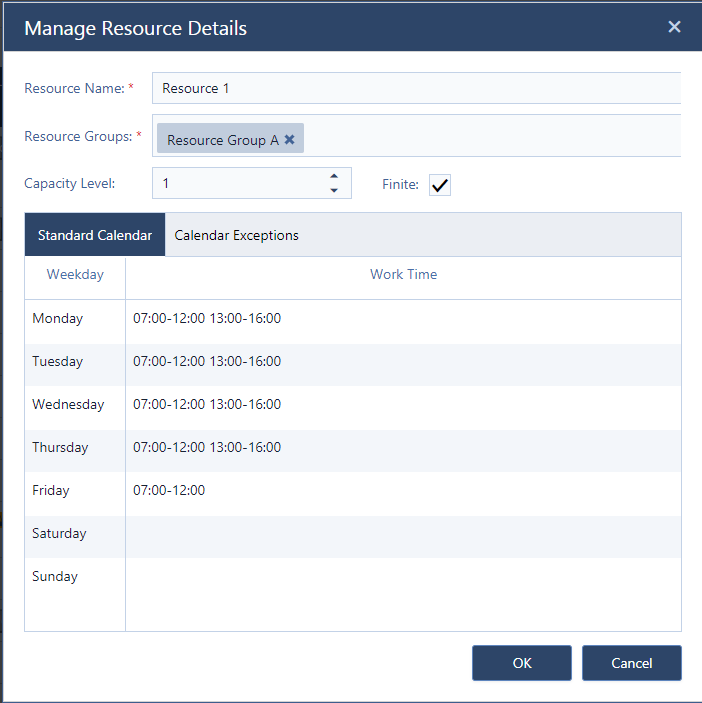
In the "Manage Resource Details" you can add working times attributes to your resources.
The options in detail:
| Modify the resource name. | |
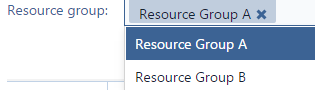 |
Select the resource group/s. One resource can be assigned to multiple groups. The resource is diplayed in all groups it has been assigned to, its allocation in one group being shown in the other groups as well, the bar there being colored with less opacity. |
 |
Specify a capacity level if needed. The capacity level can be defined as an integer value. A resource with a higher capacity level can complete the same task faster than a resource with a lower capacity level. That means that you do not need to schedule down to a single resource, but than you can cluster some resources into teams. A dedicated capacity level (i.e. other than the default 1) is indicated in the Resource and the Resource Group view by a white box right next to the resource numer in the table area: This option can also be set in the "Manage Resources" dialog (see above "Edit a resource's working time details"). |
|
If you define a resource as infinite by unticking the corresponding checkbox, this means that this resource can be allocated to unlimited tasks at one time. Inifinite resources are indicated by an infinity symbol in the Resource View:
|
|
| |
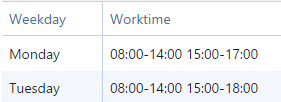
On this tab you can specify the default working times of the selected resource. |
 |
|
|
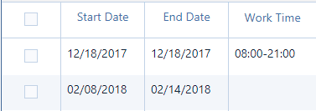
On this tab you can specify deviations from the standard calendar for the selected resource. (If you want to specify deviations for several resources in one go, switch to the Manage Calendar Exeptions dialog.)
|
|
Create and edit resource groups
Click on ![]() to open the "Manage Resource Groups" dialog, where you can create, edit, and delete resource groups as well as modify their resource allocation. The filter options are the same as described above for the "Manage Resource Details" dialog.
to open the "Manage Resource Groups" dialog, where you can create, edit, and delete resource groups as well as modify their resource allocation. The filter options are the same as described above for the "Manage Resource Details" dialog.
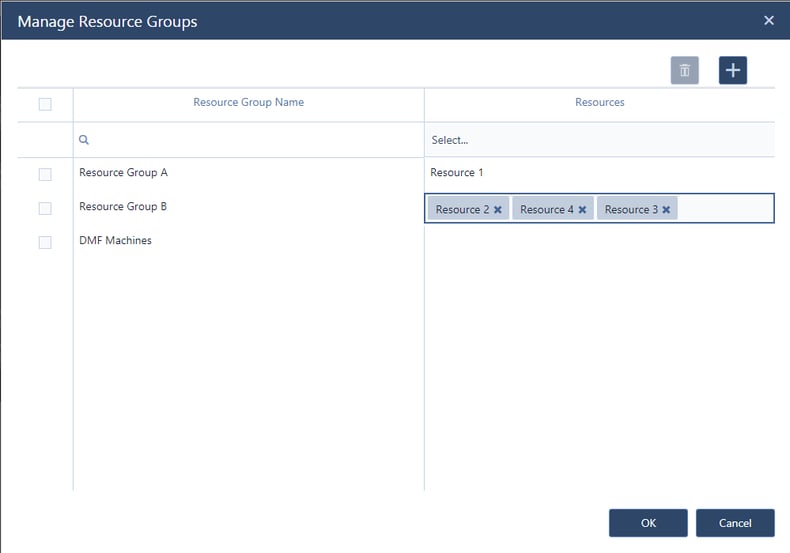
Add/remove resources to/from groups
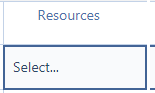 |
Click select to open a drop-down list to filter by a certain resource. |
| By clicking a resource name in the list, all resources that are allocated to the respective group will be highlighted and you can click the "x" symbol to remove this resource from the group. | |
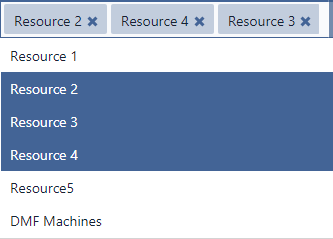 |
Clicking a resource name two times (note: no double-click), you can add further resources from the drop-down list. |
| If you click in the resources field of a resource group containing no resources, the opposite button will appear. Clicking this button will open the drop-down list with resources. |
More information
Tutorial videos
Webinars
Watch our advanced-beginner webinar that amongst others shows how to work with flexible resources (resources in multiple groups; starting right at the beginning).