The Mapping Dialog 
Clicking the above button in the “Settings” tab of the menu ribbon opens the corresponding dialog where the necessary settings for mapping your own production scheduling XLS spreadsheet with the just plan it data model can be made.

In case you want to import data out of any XLS file and you don’t use our production scheduling Excel template which is our default XLS source, you first have to newly define the upload rules. Therefore you have to assign the data fields/columns in your sheet to the according fields of our just plan it template, meaning you have to tell the just plan it software where to find the required data in your own spreadsheet. For that matter the assignments refer to the headers of your sheet. Once this is done and you successfully proceeded your first upload, your mapping is saved. Thereafter this mapping is the new default for all your uploads. Just click the upload symbol ![]() and select your sheet.
and select your sheet.
Here's how to proceed
|
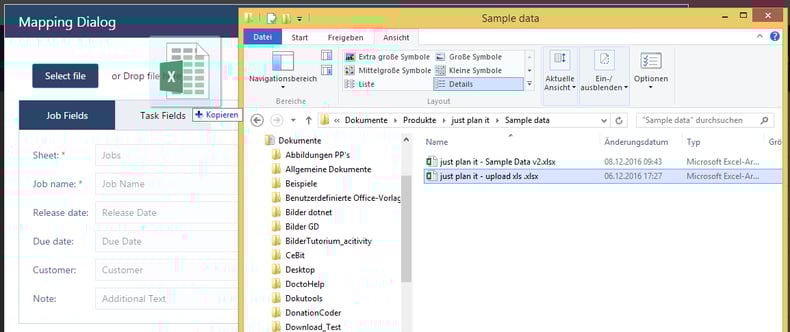
Select the desired XLS file or drag it from a file browser to the dialog: |
After the file was successfully selected you have to to map your data to our scheme. This is done by selecting the desired field names from drop-down lists offering the values coming from your XLS file.
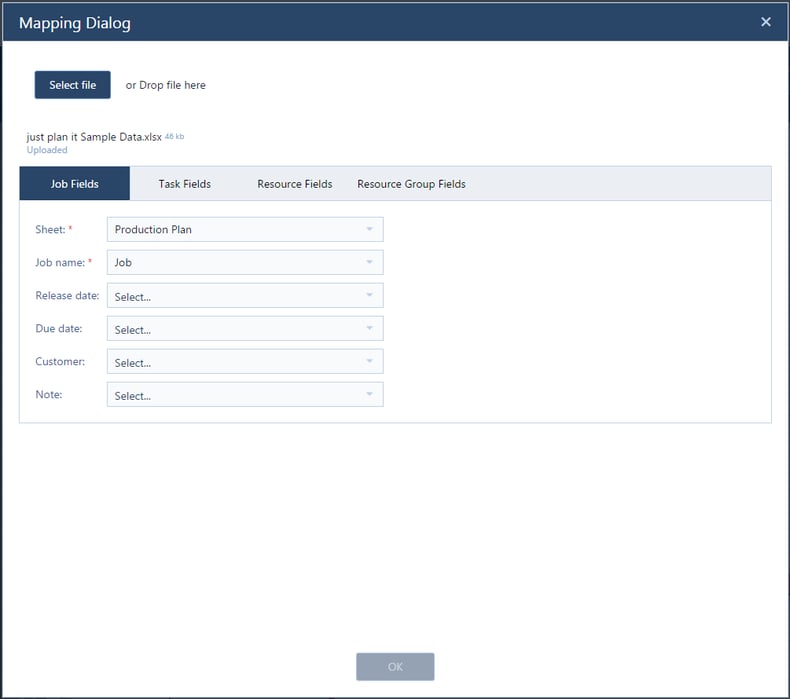
Fields with a red asterisk (here: “Sheet” and “Job name”) are mandatory fields and need to have an equivalent in your XLS file. The field "Sheet" is not mandatory in the Resource Fields tab and the Resource Group Fields tab which means that an upload without the fields of these tabs can be carried out successfully whereas the mandatory fields of the other two tabs must be filled in.
Please make sure that you properly walk through the entire dialog, i.e. that you map the job fields, the task fields, and, if necessary, the resource fields and the resource group fields. Once your mapping is done and confirmed, it is saved as your new default mapping scheme and you then can upload your sheet directly via the upload button.
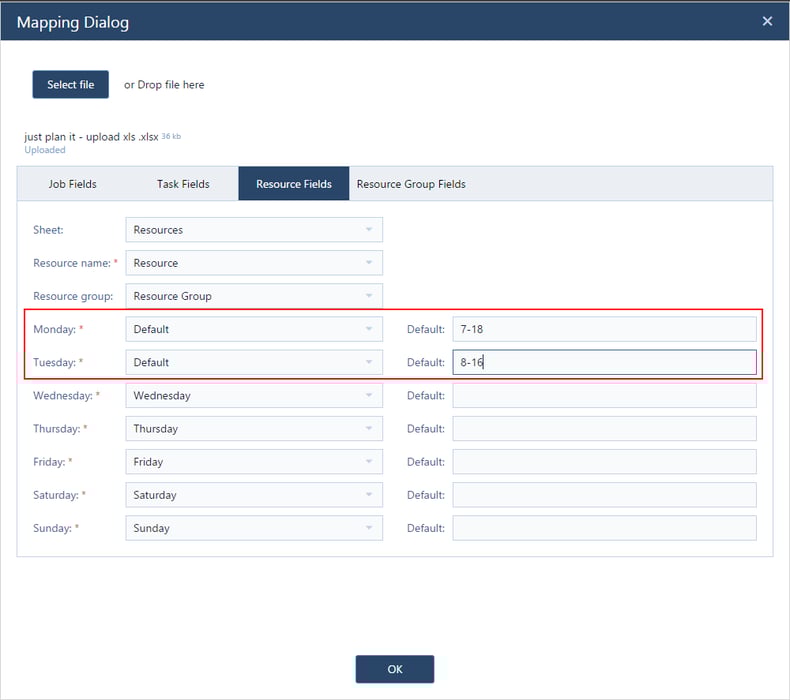
Setting default values
Either the Task Fields and the Resource Fields tab let you define default values for specific fields.
In the Task Fields tab, you can set a default for the runtime which means that all tasks created will have the same default runtime. It is useful to go for this option in case your XLS file doesn't contain a field equivalent to "runtime" or if there is such a field but there are no values in it. Note that otherwise your Gantt won't show any bars.
To do so, first select "Default" (see red frame below) from the drop-down list and enter the desired value in the according box. If you don't select "Default", your specified default value will be ignored.

The same applies to the Resource Fields tab. The values entered here set the working times for all resources that will be created.
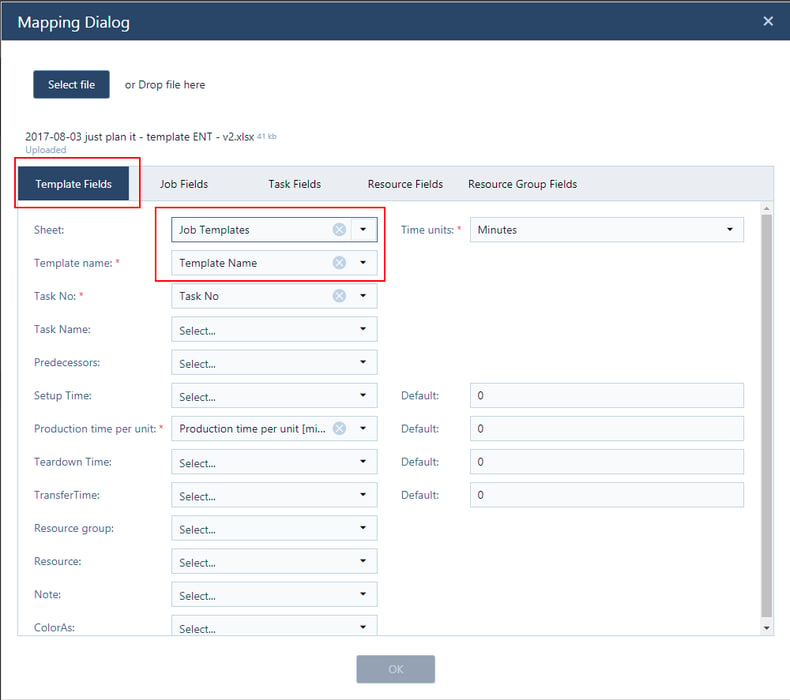
Mapping in the ENTERPRISE package
In case you want to import data from an XLS file and you don’t use our XLSX template for the ENTERPRISE package, the proceeding is the same as described above for the BASIC and PRO packages with one fundamental enhancement, however: In the ENTERPRISE package you can comfortably define job templates in your Excel sheet and use them in just plan it. For this, the Mapping dialog was enhanced by the Template Fields tab where you have to assign the data fields/columns in your sheet to the according fields of our just plan it template, as is described for the BASIC and PRO packages.