Menu


In my last blog post in January, I spoke about our roadmap. I informed you that we put some obvious things on hold to spend some time and energy on the not so obvious facets of building and running a product like just plan it. Now, I am excited to share the general availability of a long awaited (obvious) functionality: we call it the Execute Mode.
On the list of ideas we got from all our customers and users, the capability introduced with the Execute Mode is the - by far - most prominent feature request. It enables you to easily integrate information from the shopfloor into your schedule and empowers you to keep your schedule current in a straightforward way. With the Execute Mode, job shop scheduling meets manufacturing execution.
This blog post is meant to be an introduction into the Execute Mode. It is not the core documentation of it. Within the blog post, I reference a lot of additional learning and enablement material.
So far, we treated every task and and job in just plan it as "planned" and hence every task and job could get impacted by changes to the schedule. There was no way to set a task as started and hence to freeze its start date. This is fundamentally changing with the Execute Mode. The purpose of the Execute Mode is to empower you to keep your schedule current by integrating shopfloor data.
As such, the Execute Mode enables you
Conceptually, the Execute Mode brings a new type of user (in addition to planner and viewer) to just plan it. This is the operator. The role of the operator is to provide the planner with any kind of scheduling-relevant information from the shopfloor.
Important note: we've built the Execute Mode to facilitate this role. In the first version of the Execute Mode that we roll out as of today, there is no "formal" operator role. The above tasks need to be carried out by somebody with planner rights for the time being.
This leads to the following workflow
This process is outlined in the short video sequence below and will get introduced in more details in the remainder of this blog post.
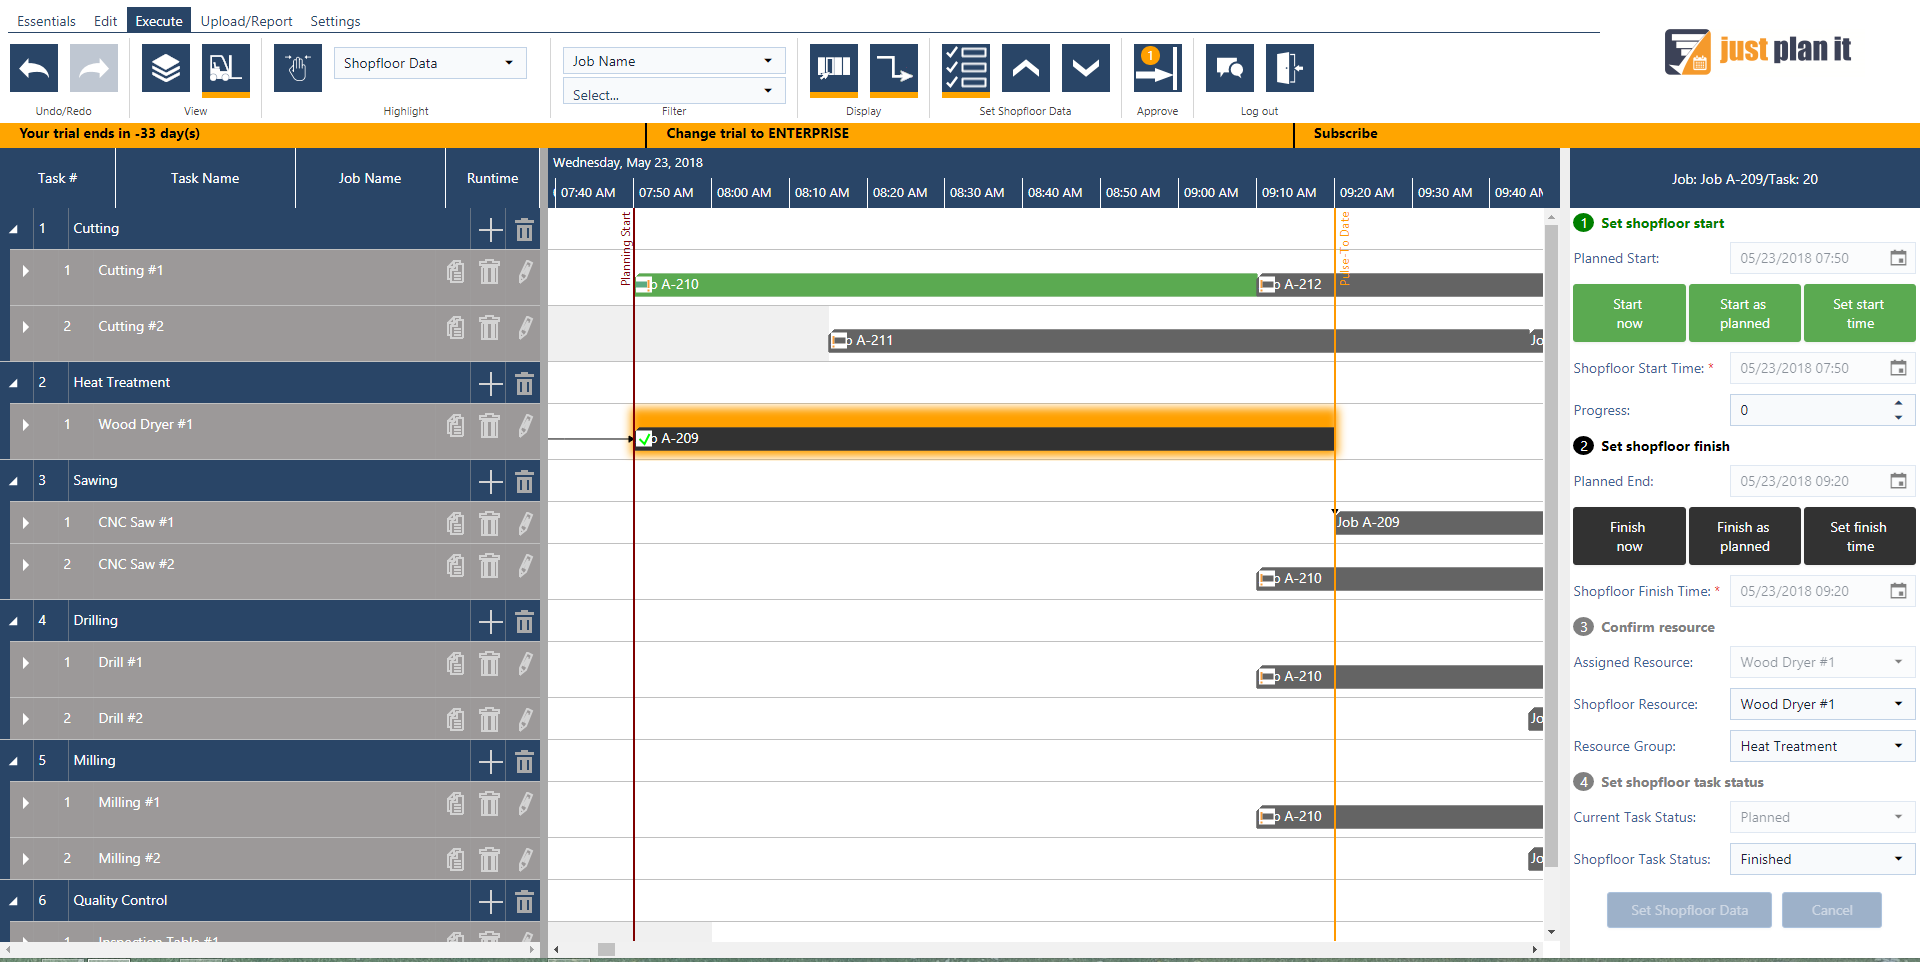
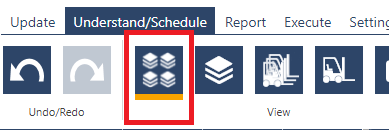
You can access the "set shopfloor data" stage of the Execute Mode via the Execute tab in the menu bar. This opens a view in which you can toggle between Job View and Resource View, quickly navigate from one task to another, and provide data from the shopfloor regarding individual tasks.

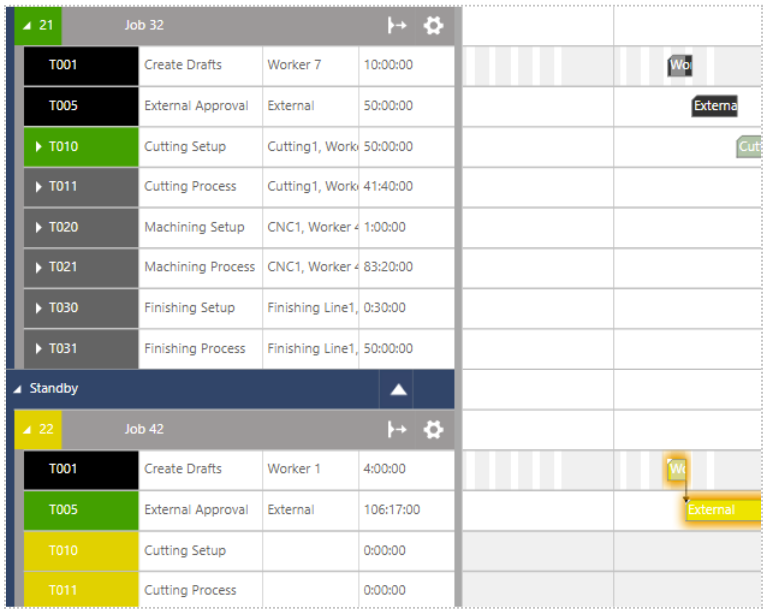
The left part of the "set shopfloor data" stage are, as you have been knowing them, from just plan it. You see the visual schedule in a Job View and a Resource View. The only difference is that you cannot schedule anything when you are in the Execute Mode. Hence, drag & drop does not work here and all scheduling buttons are grayed out. The Execute Mode is just for setting and approving shopfloor data.
The right part of the "set shopfloor data" stage is meant to provide the feedback from the shopfloor about the selected task. Here you can:
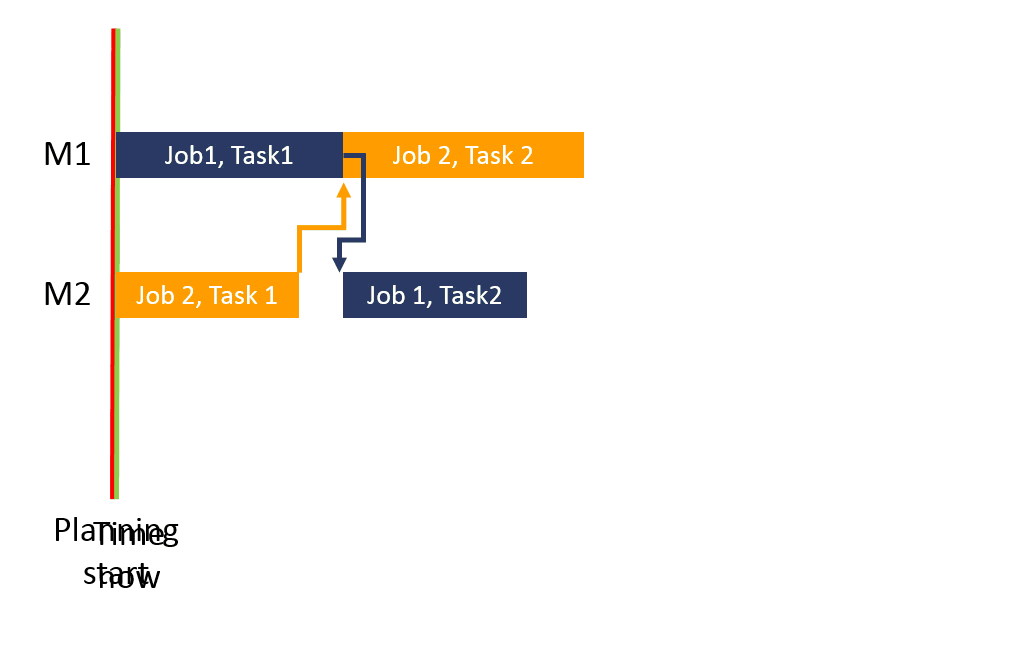
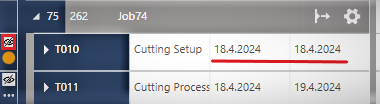
By giving this explicit information, the operator also provides an important implicit information. This is the date that represents his most recent feedback. This date marks the date for the (new) yellow pulse-to line. It is the date to which the planning start of the entire schedule will be pushed when the planner approves the shopfloor data.
This brings me to an important facet of the Execute Mode
All of the information you provide in the "set shopfloor data" stage will be stored in a separate database. They will not get automatically pushed into the schedule as we are convinced that the planner should sit in the driver's seat. You as planner can decide when to update the schedule with the shopfloor data by approving them. You also can decided to modify them first.
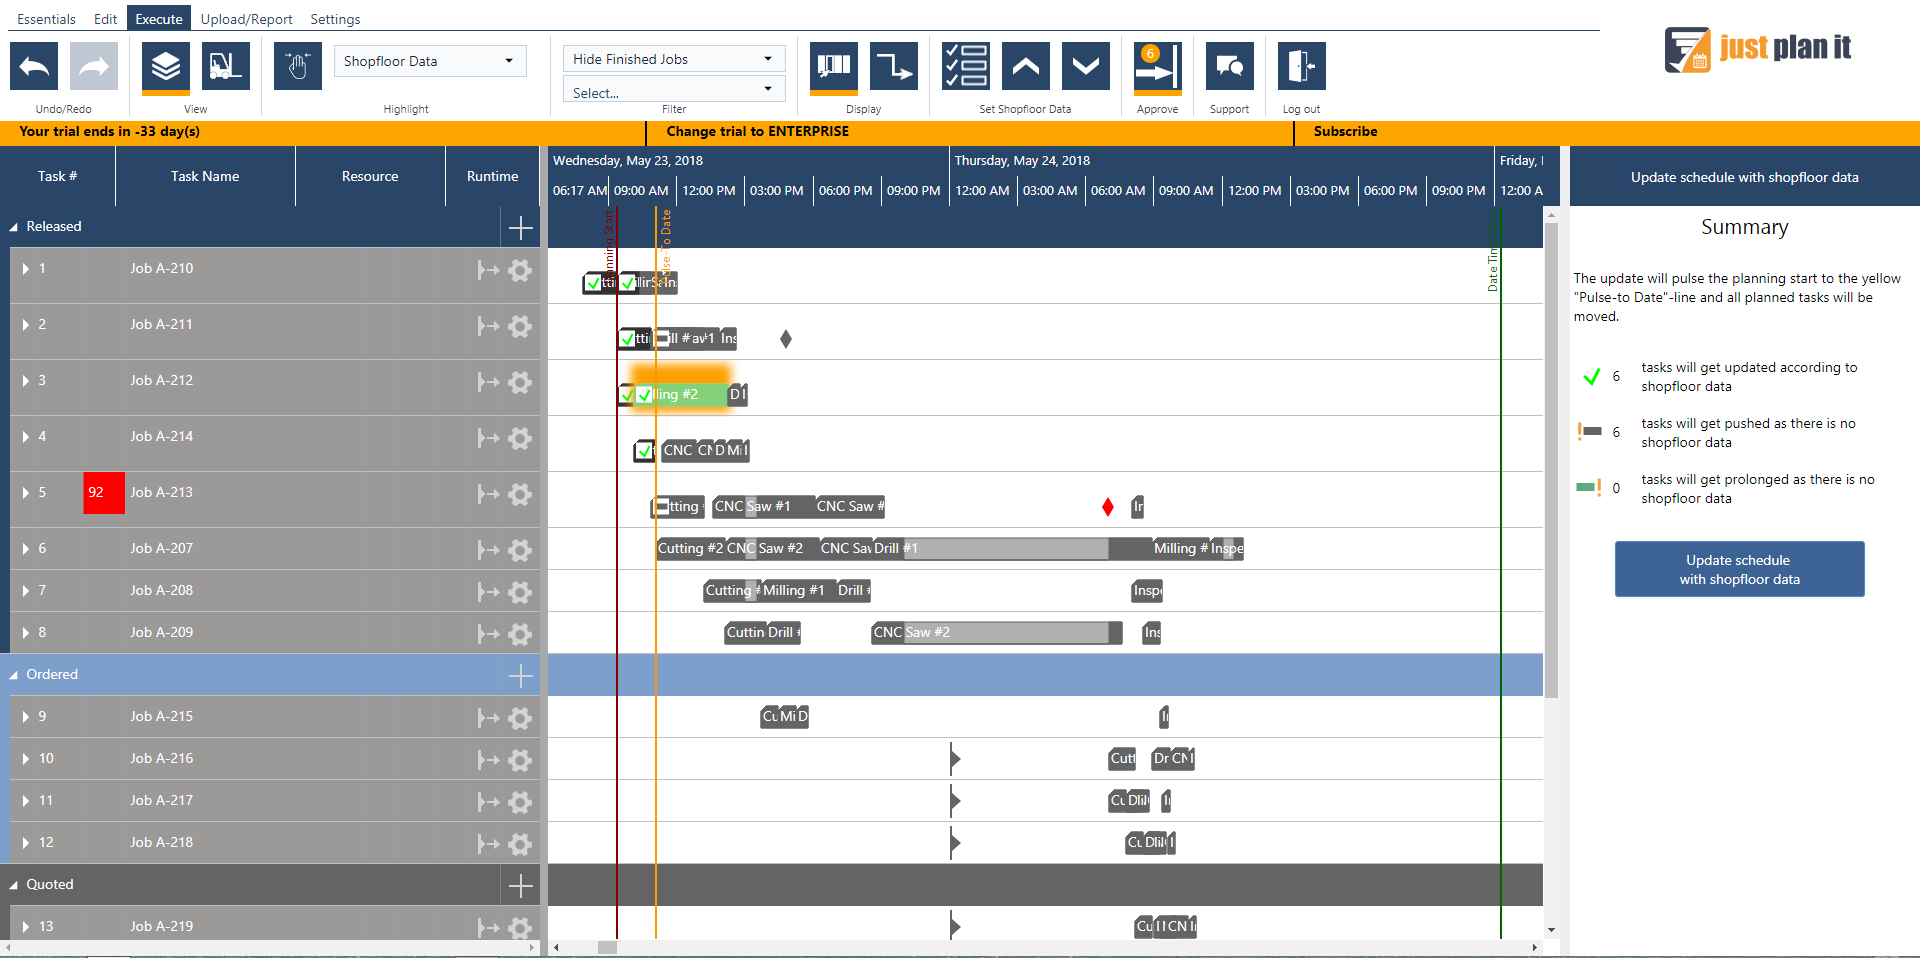
![]() You can see that there are "to be approved" shopfloor data from the new "enter approval mode" notification icon which is placed both in the Essentials tab and the Execute tab. If you click this icon you get a summary on the data you have ... and on (potentially) missing data.
You can see that there are "to be approved" shopfloor data from the new "enter approval mode" notification icon which is placed both in the Essentials tab and the Execute tab. If you click this icon you get a summary on the data you have ... and on (potentially) missing data.
There are tasks that
Once reviewed, the planner can push the "update schedule with shopfloor data" button and the entire schedule is updated by pushing the planning start to the pulse-to line.
The Execute is not at all a trivial functionality, and it - most likely - will have a major impact on how you work with just plan it going forward. It may take some time until you get used to the concrete behavior of constantly updating the schedule. We would like to help you on this journey and provide no less than a plethora of getting started support.
The Execute Mode had been rolled out to your accounts already. It is available, but deactivated. We want you to make a conscious decision to go for it. You need to switch it on via the settings.
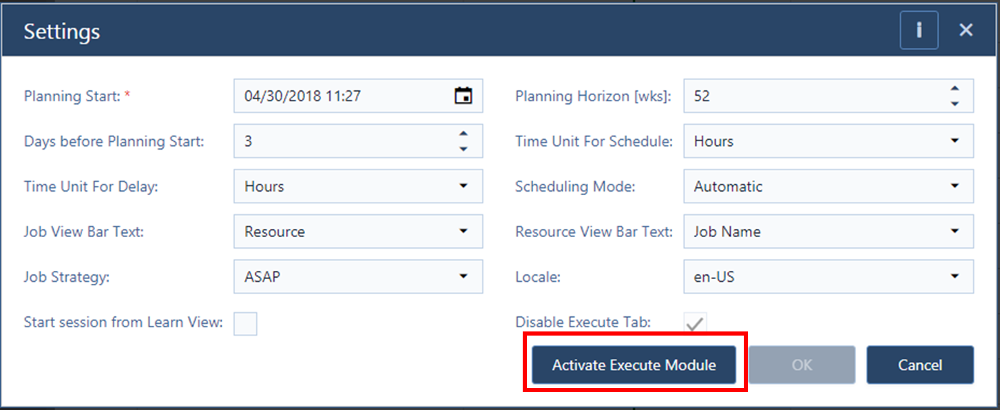
Speaking about the settings:
We have a goodie for paying customers. You can continue to work with just plan it as you are used and - in parallel - play a bit with the Execute Mode. We call this playground the sandbox, and we have one sandbox for each customer. It contains your data as of the moment that we shipped the Execute Mode and should provide you a well-oiled start into the Execute Mode.
We want to give everybody the chance to get a demo and an explanation of the Execute Mode, to come up with questions and to get answers. Hence, we'll run 4 extra webinars in the next two weeks to introduce and discuss the Execute Mode for you. They are scheduled in a way that - hopefully - everybody around the globe finds a time that works for you:
The Execute Mode is a first step into making job shop scheduling and manufacturing execution coming together. We are super excited about this first step, but are also committed to making further steps. Such as
These are our ideas - for the time being. Due to well-known reasons, I will not share (yet) any information with respect to timing ;-)
However, our ideas are just one side of the medal. The much more shiny side are your ideas. Would you mind sharing them with me in the comments below?

just plan it is a production scheduling software plus scheduling tools & best practices to help high-mix low-volume make-to-order manufacturers gain transparency and control over their shop operations. The software plus its methodology is used by thousands of people around the globe. They consistently achieve improved on-time deliveries, shorter lead times, and better utilization of their resources.
As just plan it is not just software, but a lot of processes and best practices, we recommend that you start with an exploratory meeting. If we agree that there is a fit between your requirements and our approach, we'll build a prototype for you.
Hence, it all starts with a meeting. Book that meeting now.
Comments (2)