
Upload Data with the just plan it-template
An easy way to upload starting or additional data into just plan it is via xlsx-upload. For such cases we designed a standard-xlsx-interface that can be run using our xlsx template. Just download the file here.
This template consists of three tabs: „Resources“, „Jobs“ and „Tasks“. Here all columns that must be filled with data are marked with a dark yellow header. Columns that have a light yellow header offer the possibility to upload additional data. In the tab „Resources“ you need to list up all different resources you have and give each resource an individual name (see below, column A). Furthermore you need to define which resource group each resource belongs to (column B). Here, in this example, Cutting can be done alternatively by Machine 1 or 2 while Milling just can be proceeded by Machine 2 and so on. Finally you have to insert the shifts of each machine on each day of the week (column C – I).

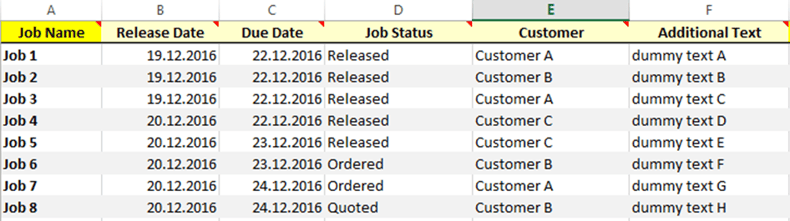
After completion of tab „Resources“ you can go on with „Jobs“. Just list up all your jobs you want to upload by giving it an individual name (see below, column A). Furthermore you can provide additional data, such as:
- Release Date (column C): the release date marks the earliest possible start date. E.g., this can be a delivery date of material that you need for production.
- Due Date (column C): the due date is the date when your jobs must be finished latest.
- Job Status (column D): in just plan it we separate between „Quoted“, „Ordered“ and „Released“
- Customer (column E)
- Note (column F): here you can insert any additional text or information that might be helpful. This text will be shown in the tool tip when hovering over the Job in the Gantt chart.
Finally you need to define the tasks of your jobs in the tab „Tasks“. Every task of one job is defined in an own line. In our example Job 1 consists of four tasks: Cutting, Milling, Molding and Finishing. To insert the tasks in the correct way start with the Job Name (column A). Please take care that you use exactly the same Name/string as defined in „Jobs“.
Then insert a Task Number (column B) and if you want you can also add a Task Name. After that it is important to set the Runtime. This is the total amount of minutes that the task needs to be proceed. Then insert the Resource group that is capable to fulfil the task. Again: Please take care that you use exactly the same Name/string as defined in „Jobs“. Additionally you can also directly assign a special Resource (column F). But this means that the task must be produced on this special resource only, even though there might be other resources within the respective resource group.
If you want you can set a time restriction for a task (column G). This is analog to Release Date for jobs: here it means that the respective task must not start earlier than the fixed date. If you have relations between your tasks this needs to be defined in column H. Set the predecessors for each task. In our example we have a straight chain, means task 2 can only start after task one is completed and so on. You also can define „nets“: just insert two predecessors (separated by a comma and a blank) for one task. Finally you can also provide additional information for each single task (column I).

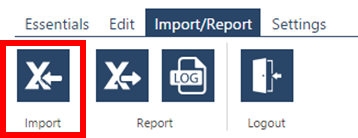
This (almost) is it. Now you just have to save and upload the xlsx-file. To do so, just click on the „Import“-icon within the „Import/Report“-tab in just plan it (see below).
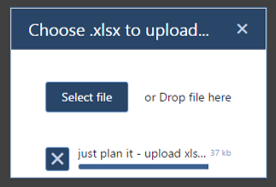
Then click „Select file“ and choose the template that you filled before or drag and drop the file onto the window (see below). Then the upload automatically starts and your data will be visualized in just plan it.
You can also upload your data via an interface to your ERP-System. For more information see here.
Tutorial video
Extended upload for ENTERPRISE package
In addition to the functionalities included in the BASIC and PRO packages as described above, the xlsx template for the ENTERPRISE package offers significantly enhanced functionality:
Define all your job templates in Excel and upload them into just plan it.
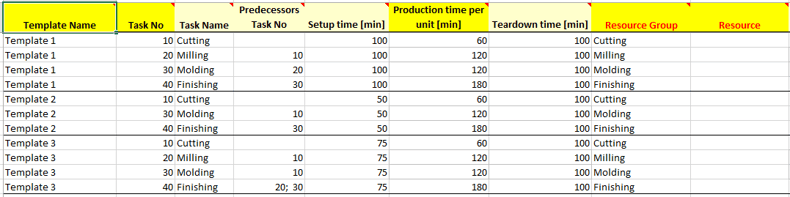
The ENTERPRISE template contains the additional Job Templates tab where you can comfortably define all job templates needed as is shown in the above screenshot and afterwards just upload them into just plan it by clicking the  icon. Please remember that the fields with dark yellow headers must be filled.
Upload new jobs by using a template.
If you have added templates to just plan it (either by defining them in the Manage Jobs dialog or by uploading them from Excel) you can link each job with a certain template. This is done in the Jobs tab of the Excel sheet containing your data. Just enter the name of the desired template in the corresponding column and the jobs will be uploaded with all related tasks and the fully defined routing.
Please note that if the field Quantity remains empty, it will be set to value 1.

More information
Tutorial video
Webinars
If you want to see the usage of templates in action, for an introduction to the basics watch our advanced-beginner webinar (from minute 38:00 onward), or, if you are interested in a more detailed view, watch the advanced-level webinar where using templates is illustrated by way of a practical case study (starting at minute 24:00).